Welcome to Unraid Deck! This guide will walk you through the precise steps to correctly configure your Unraid server’s API and set up the Unraid Deck app on your iPhone for direct, secure management.
Table of Contents
- Confirm Unraid Basic Configuration (Port & SSL)
- Generate an API Key
- Add Your Server in Unraid Deck
- Start Managing Your Digital Assets
1. Confirm Unraid Basic Configuration
Before the app can connect to your server, we need to verify your Unraid access configuration.
Log into your Unraid Web UI: Navigate to Settings -> Management Access.
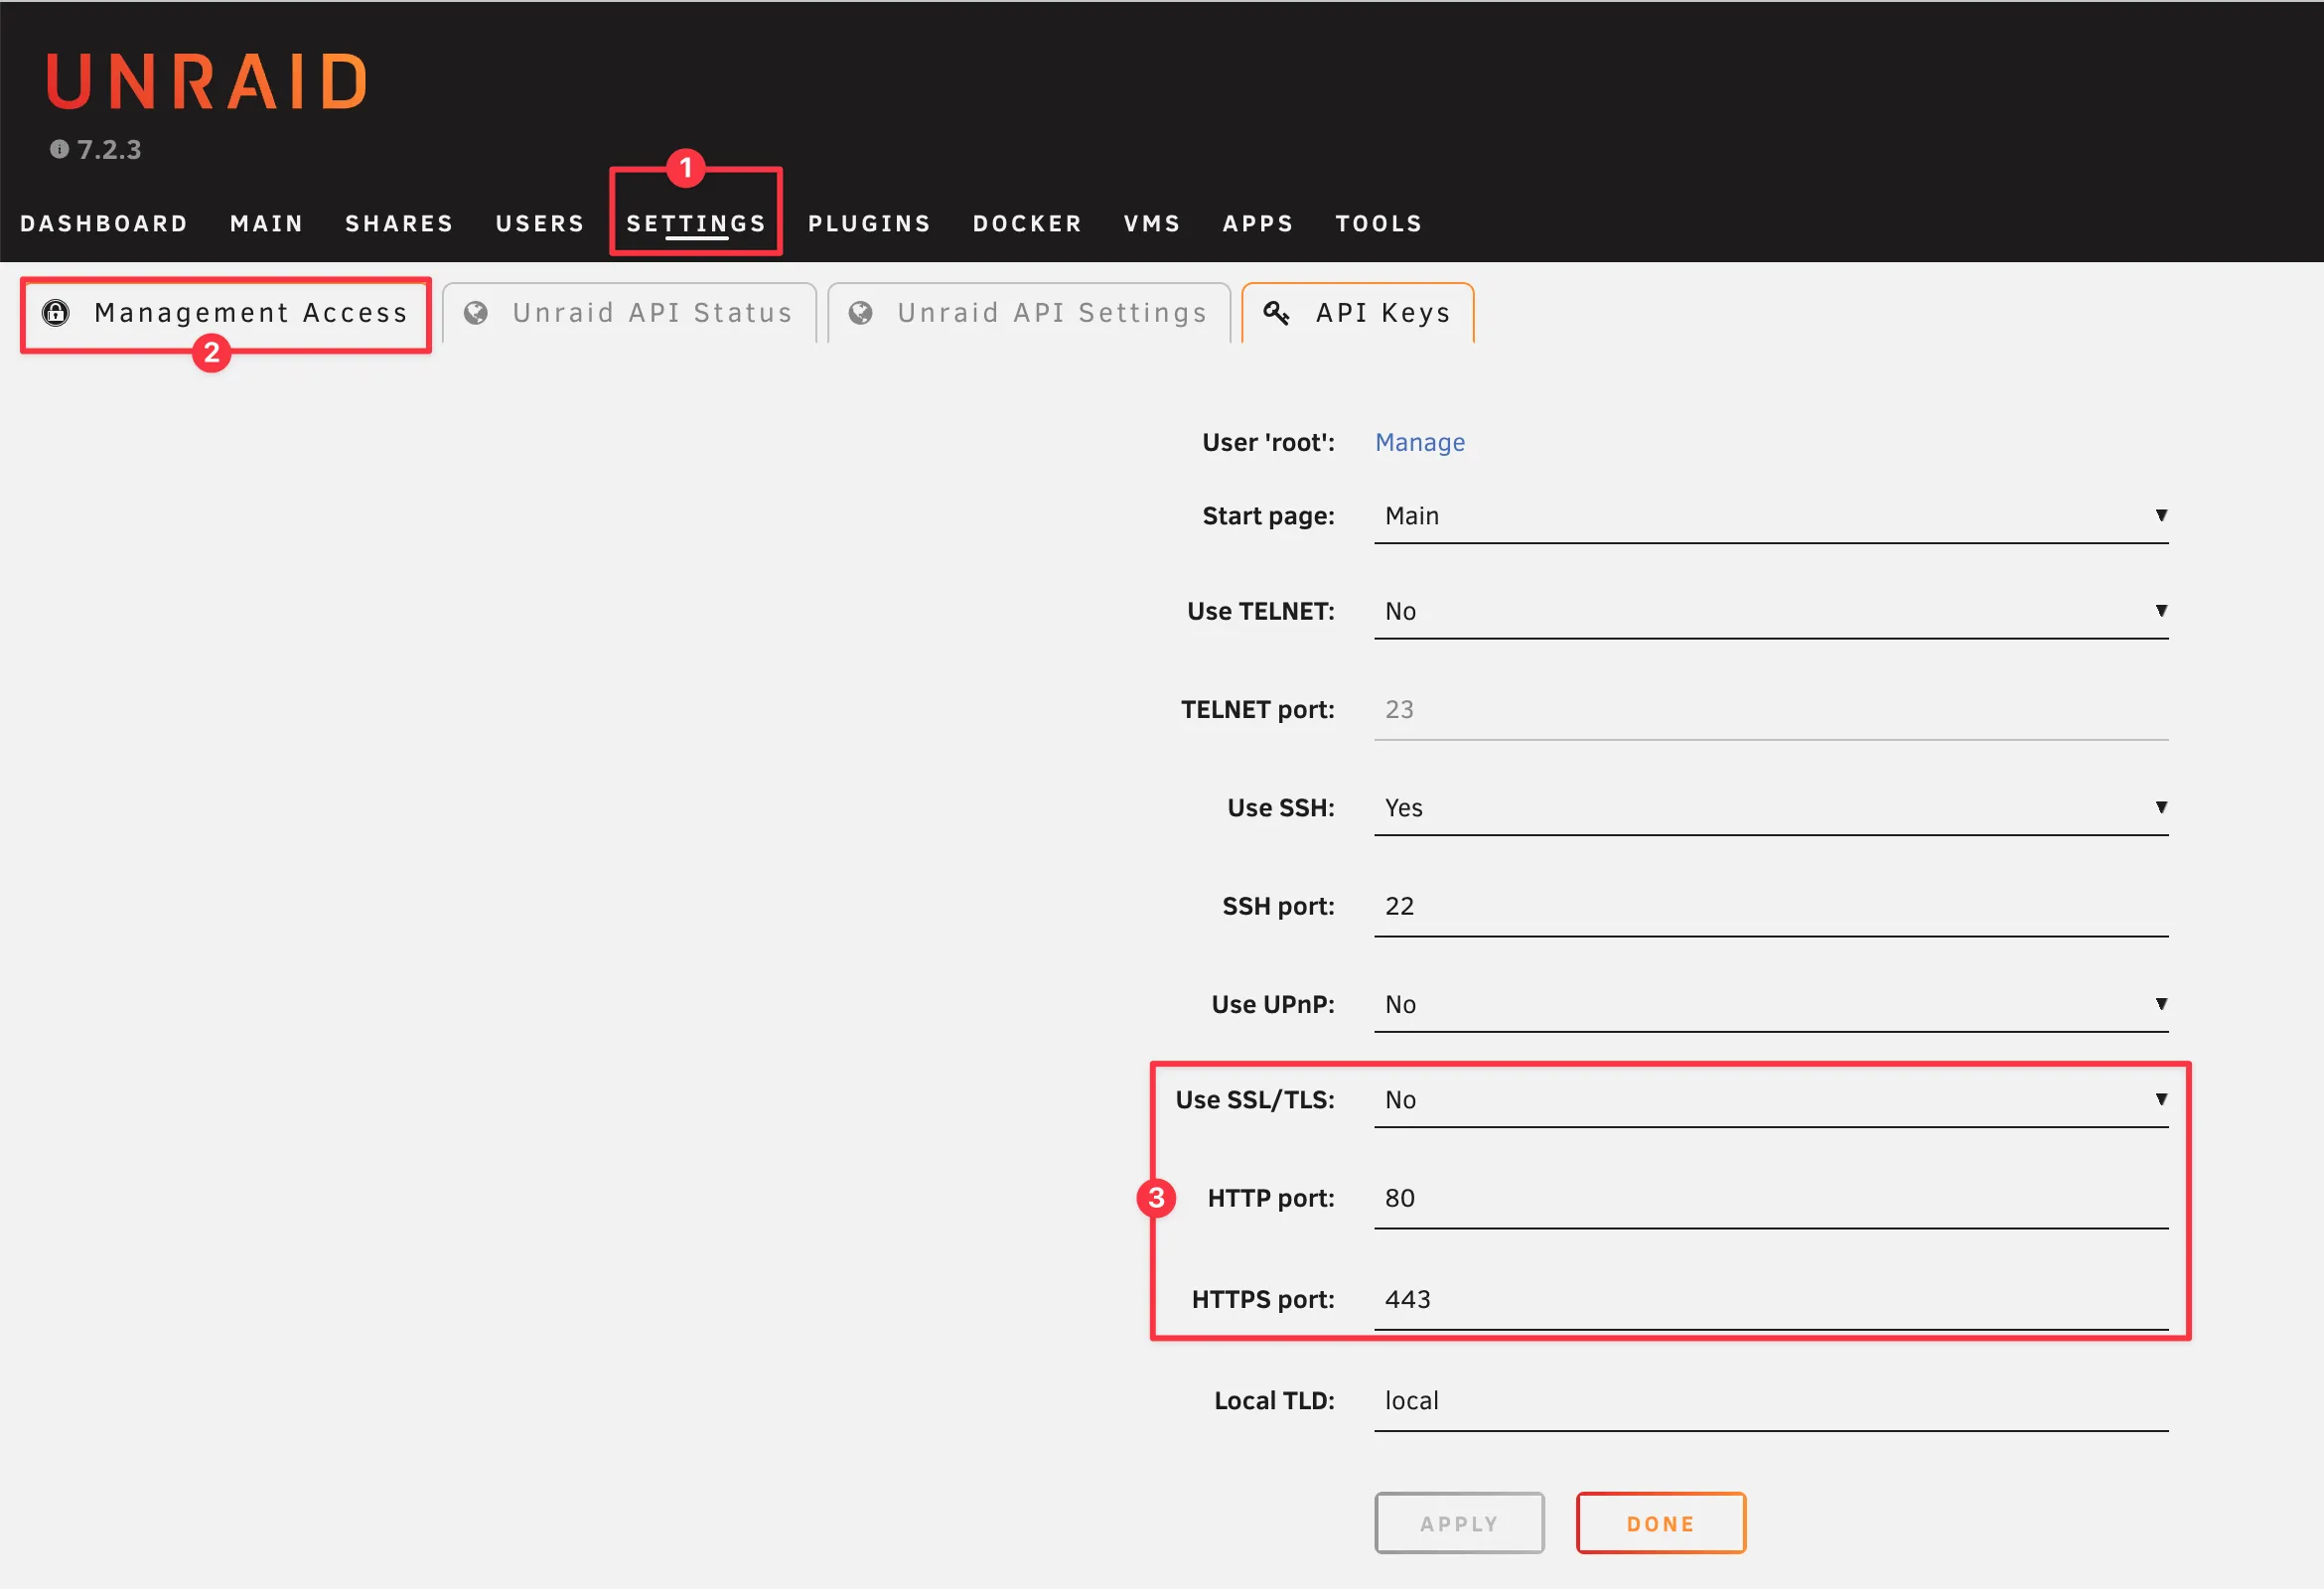
Here, please carefully verify and note down the following:
- HTTP/HTTPS Port (The port you currently use for web access)
- Use SSL/TLS (Whether SSL is enabled, and if you are using Let’s Encrypt or a self-signed certificate)
Please memorize or note down the port number and the SSL status; we will need them for the App configuration in Step 3.
2. Generate an API Key
Unraid Deck communicates securely using Unraid’s official API, so you will need to generate an API Key.
Still in the Unraid Web UI: Navigate to Settings -> Management Access -> API Keys.
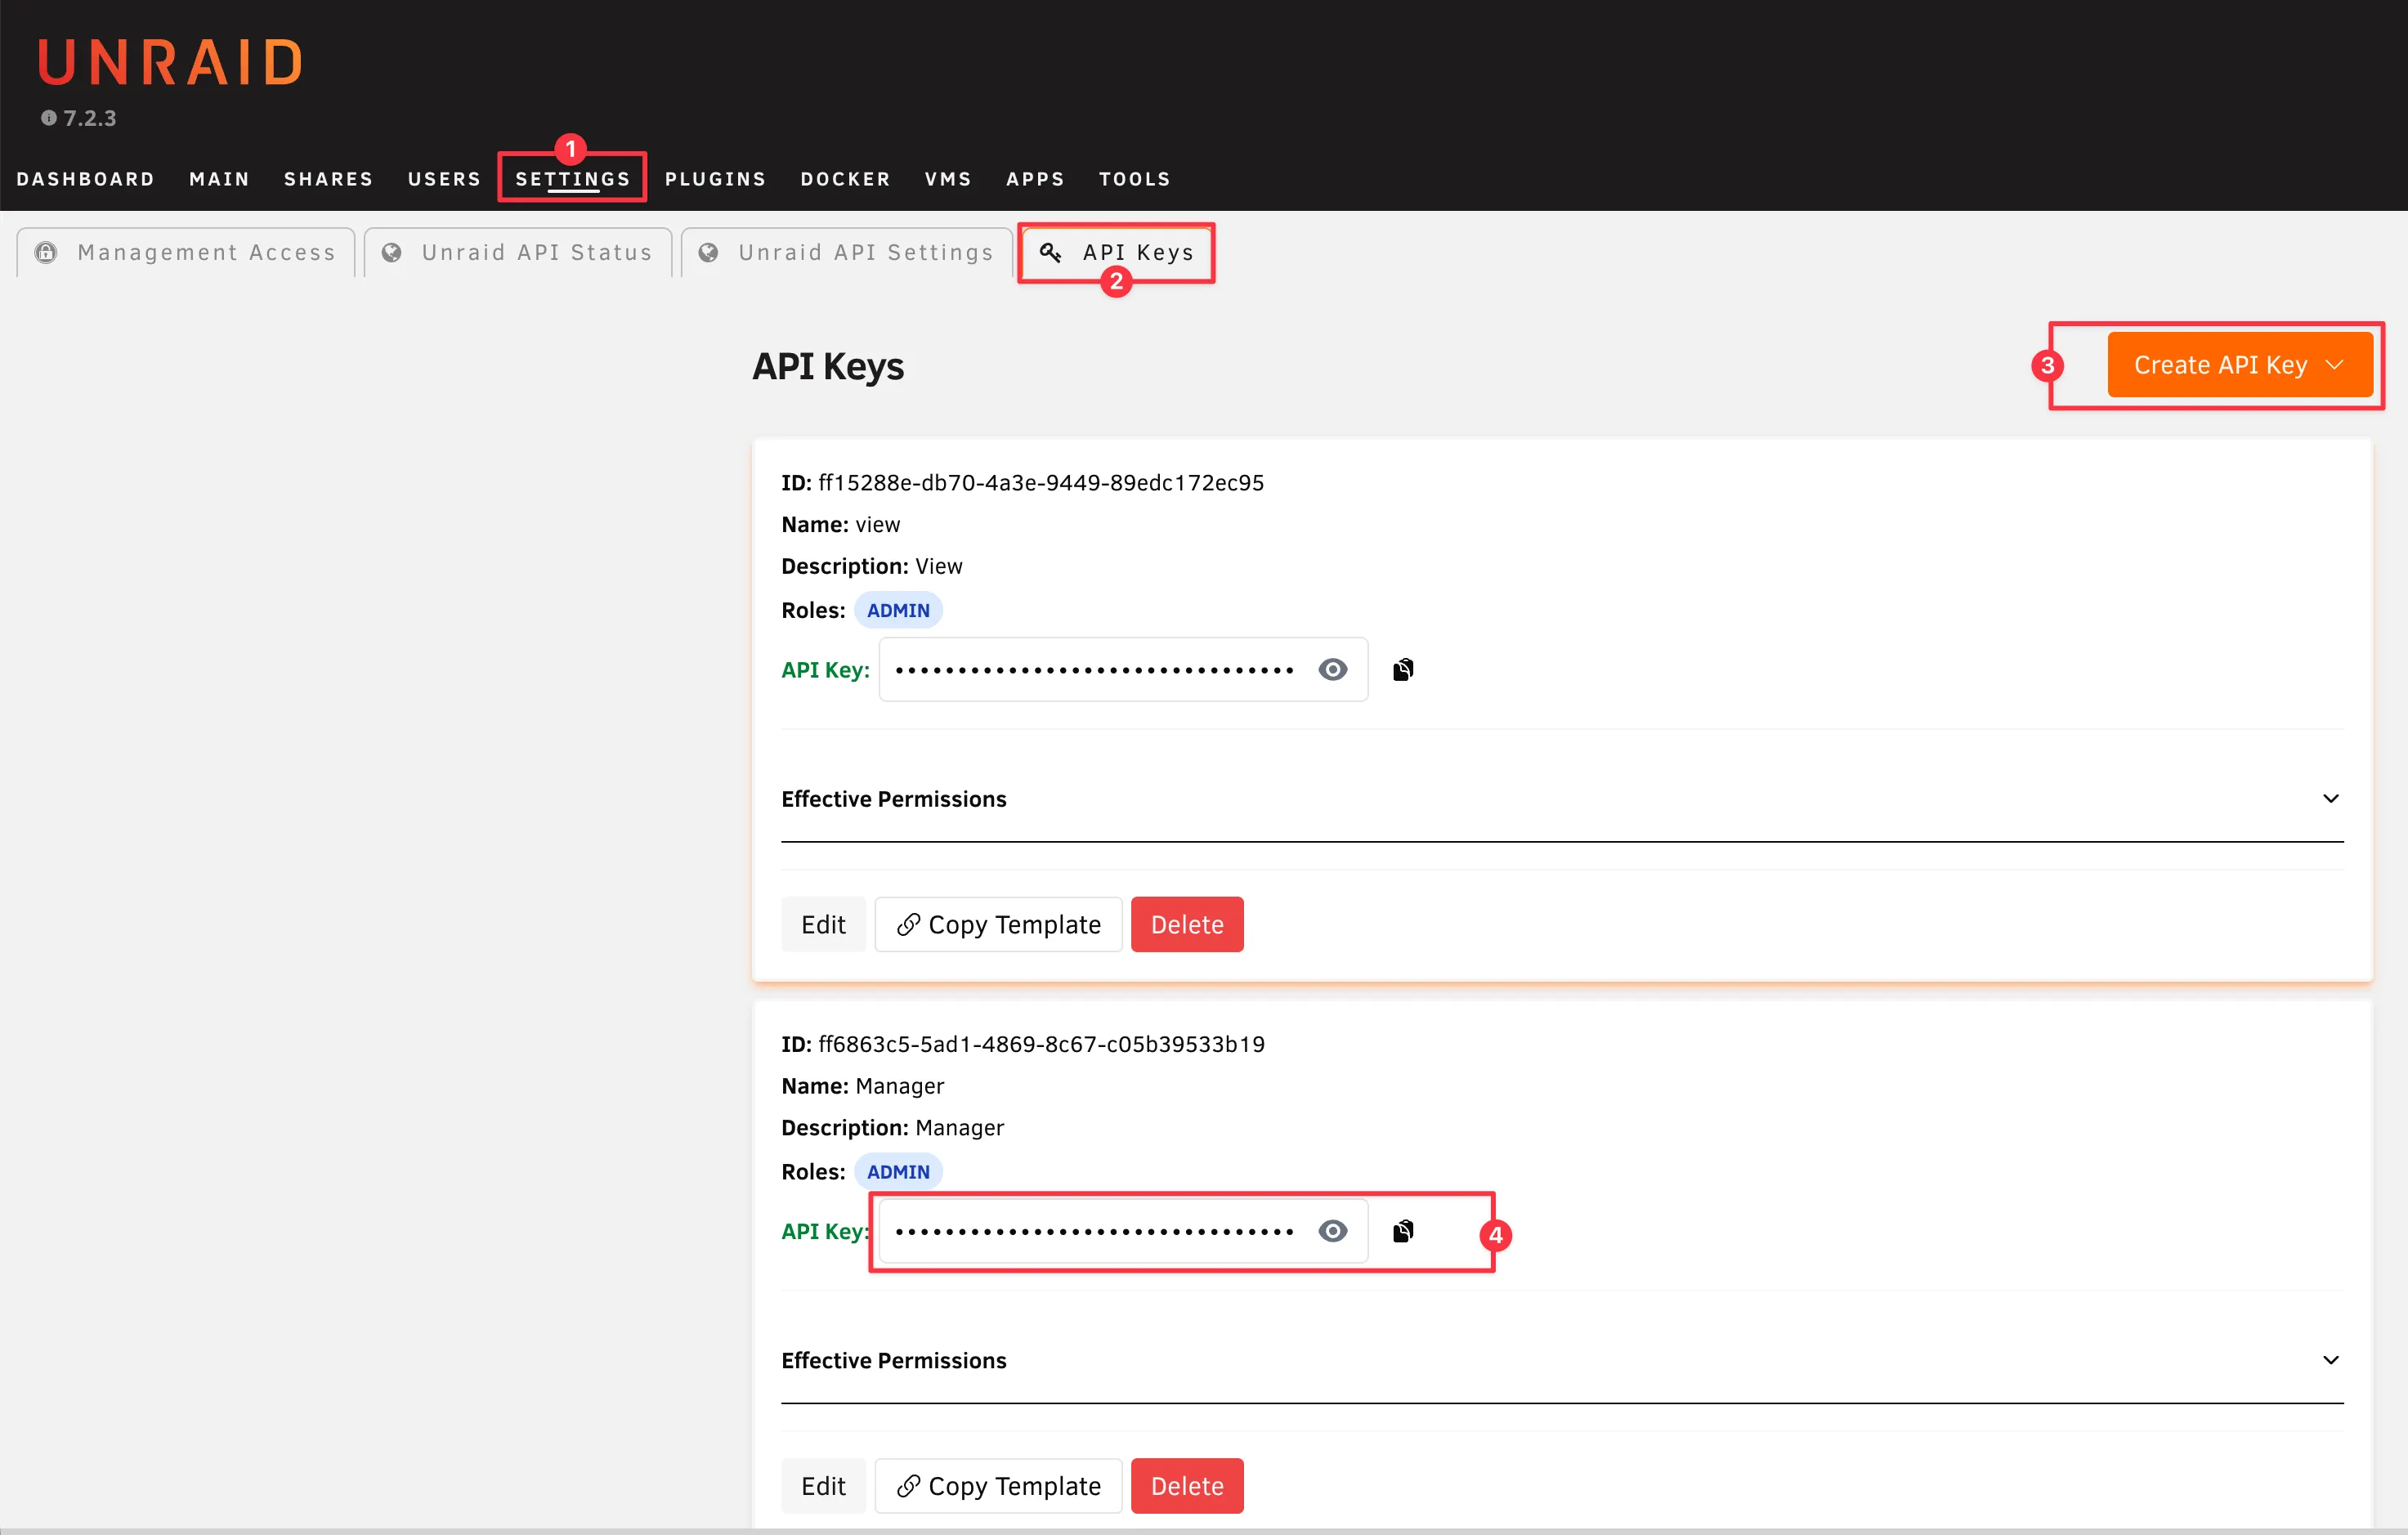
Click Add API Key. For the complete experience, you can simply assign the Admin permission. However, for maximum security (Principle of Least Privilege), we highly recommend creating a custom API key with only the required permissions. (Read our Detailed Unraid Deck API Permissions Guide to learn exactly what each permission does.)
Standardized Custom Permissions
Unraid Deck requires specific permissions to monitor telemetry and manage your containers/VMs. You can easily apply all necessary permissions automatically using our template URL.
When creating the API Key, simply select Create from Template and paste the following URL to proceed:
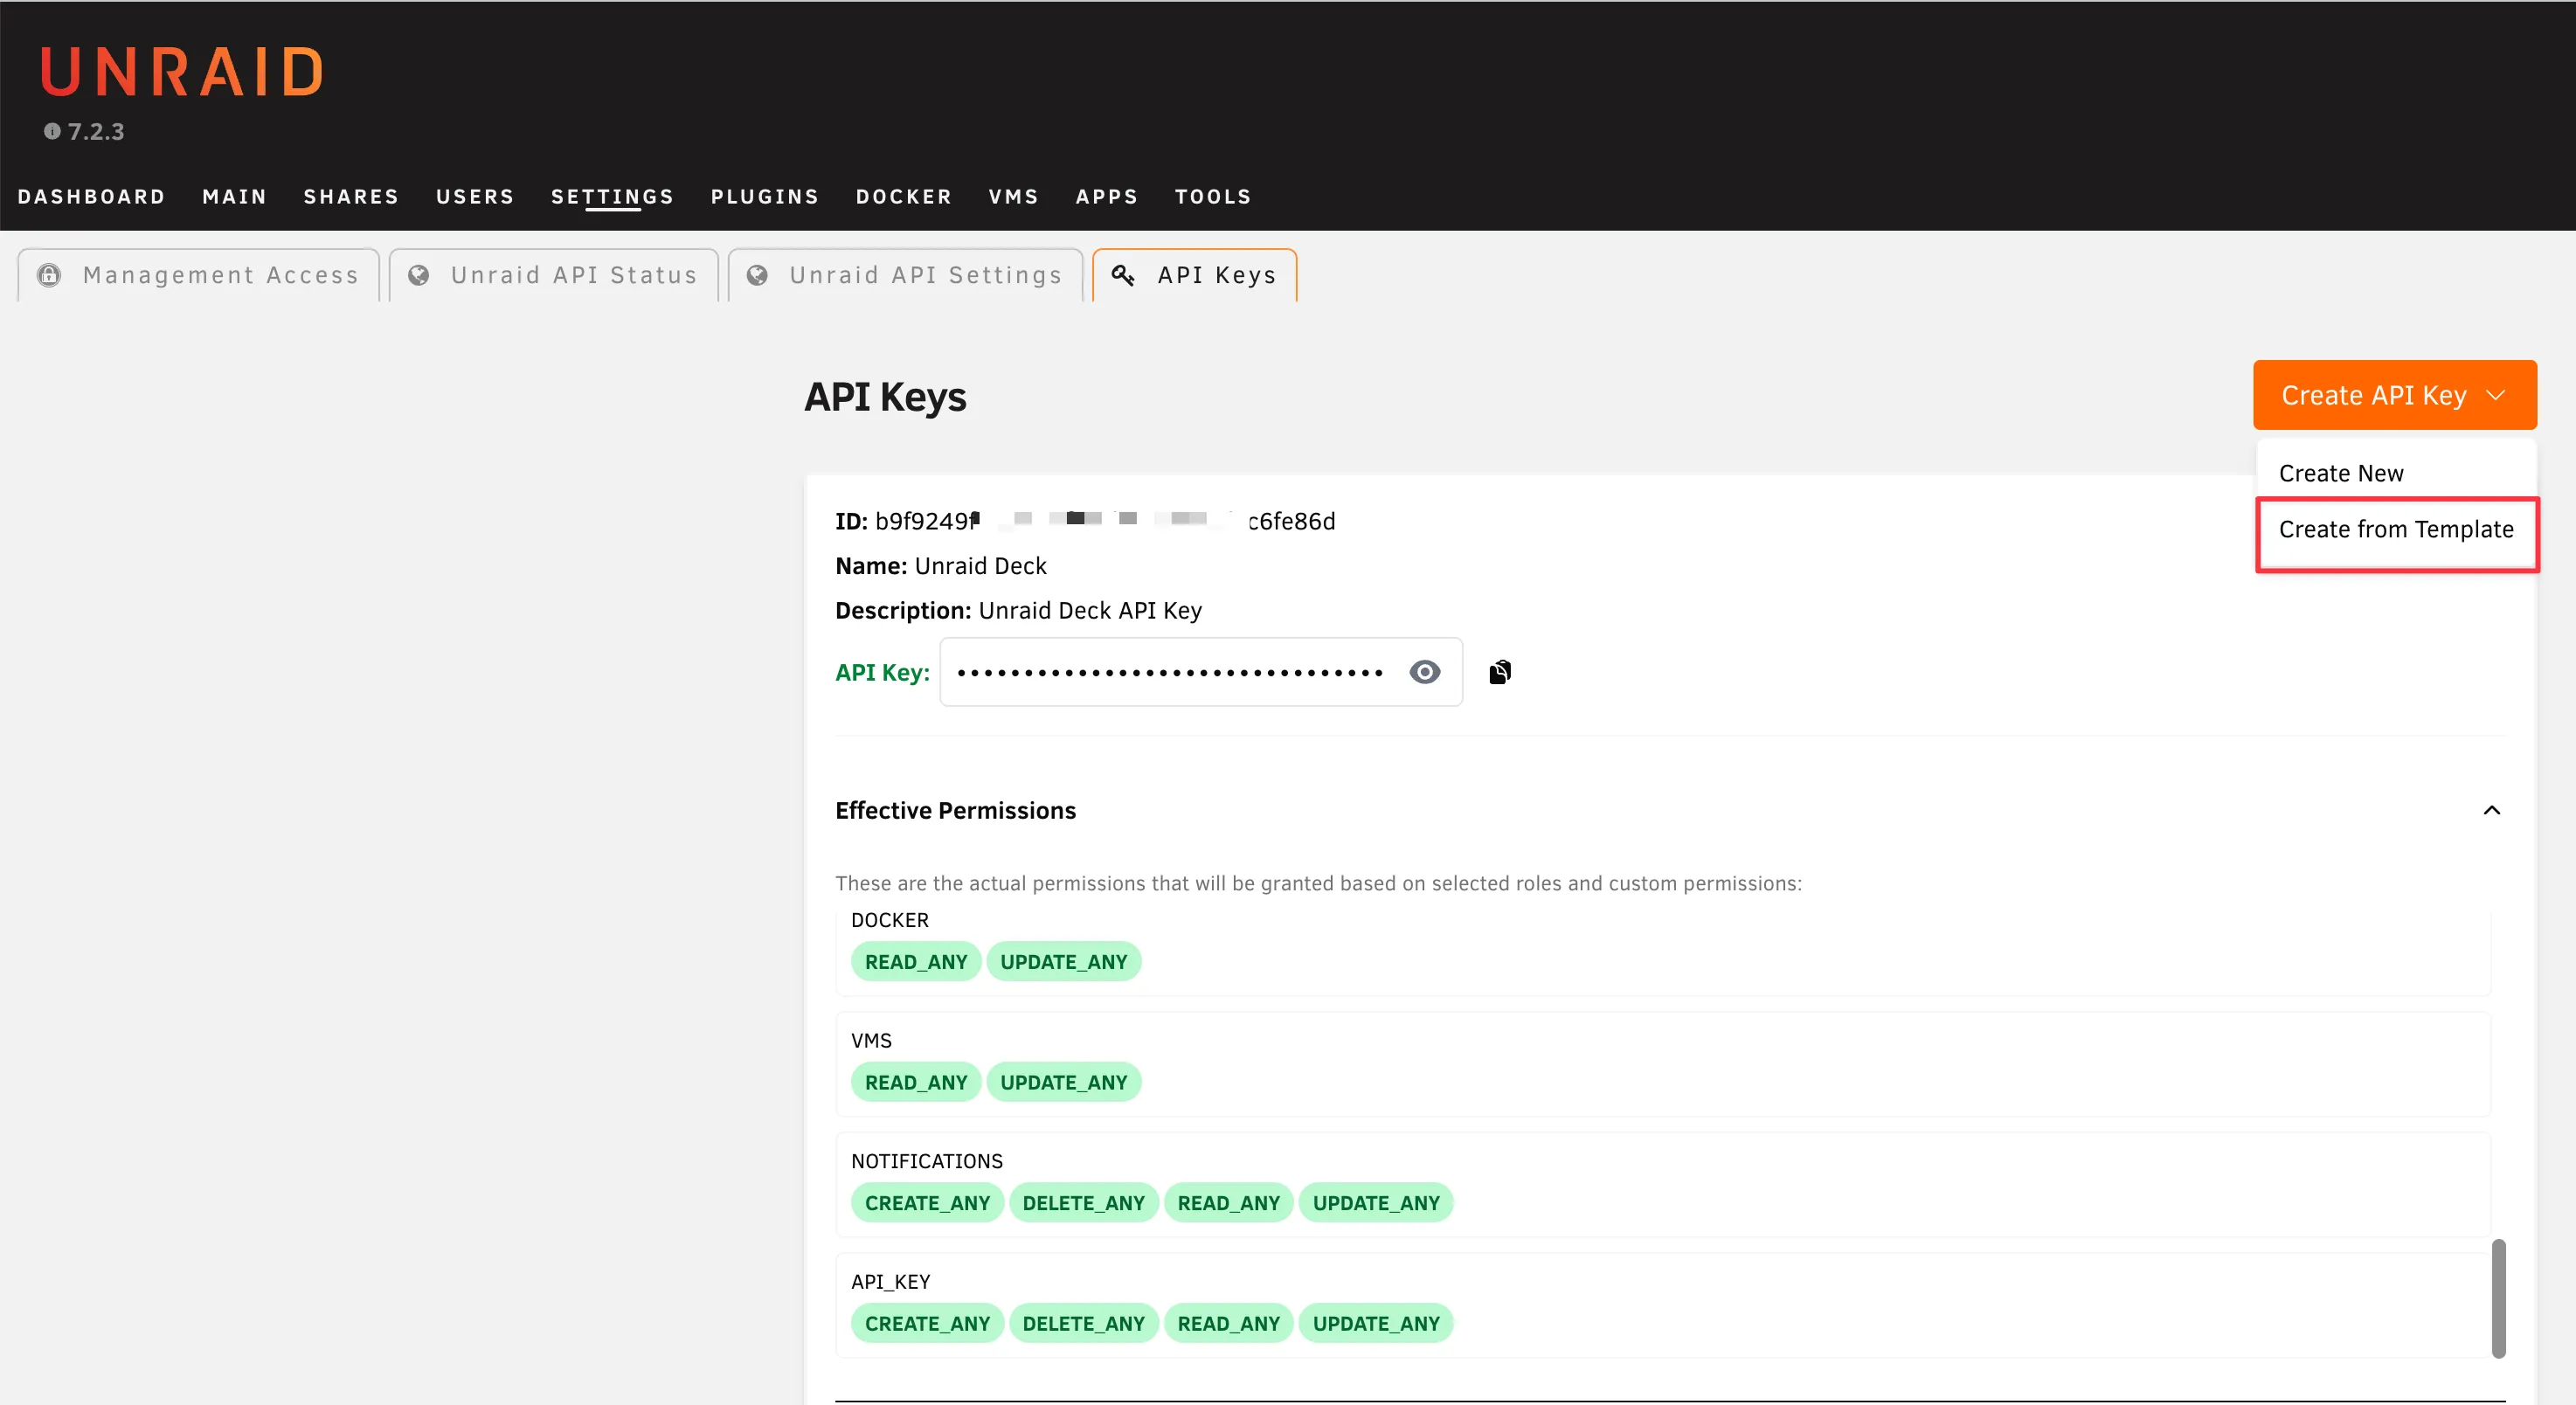
?name=Unraid+Deck&scopes=array+disk+info+logs+me+online+permission+registratio+servers+share:read_any,docker+vms:read_any+update_any,api_key+notifications:create_any+delete_an+read_any+update_any&description=Unraid+Deck+App+KeyThis template will automatically configure a new API Key named “Unraid Deck” with the following essential rights:
- Read-Only:
INFO,SERVERS,REGISTRATION,ARRAY,SHARE,DISK,LOGS,ME,ONLINE,PERMISSION - Read & Write:
DOCKER,VMS(For start/stop/restart/pause controls) - Manage:
NOTIFICATIONS,API_KEY(For in-app notification management and secure device key handling)
Pro Tip: If you only want a pure monitoring dashboard and don’t want the app to have the ability to start/stop your Docker containers or VMs, simply remove the
update_anyanddelete_anypermissions from thedocker,vms, andnotificationsscopes before saving the key.
Once created, please copy this API Key, as we will need it immediately in the next step.
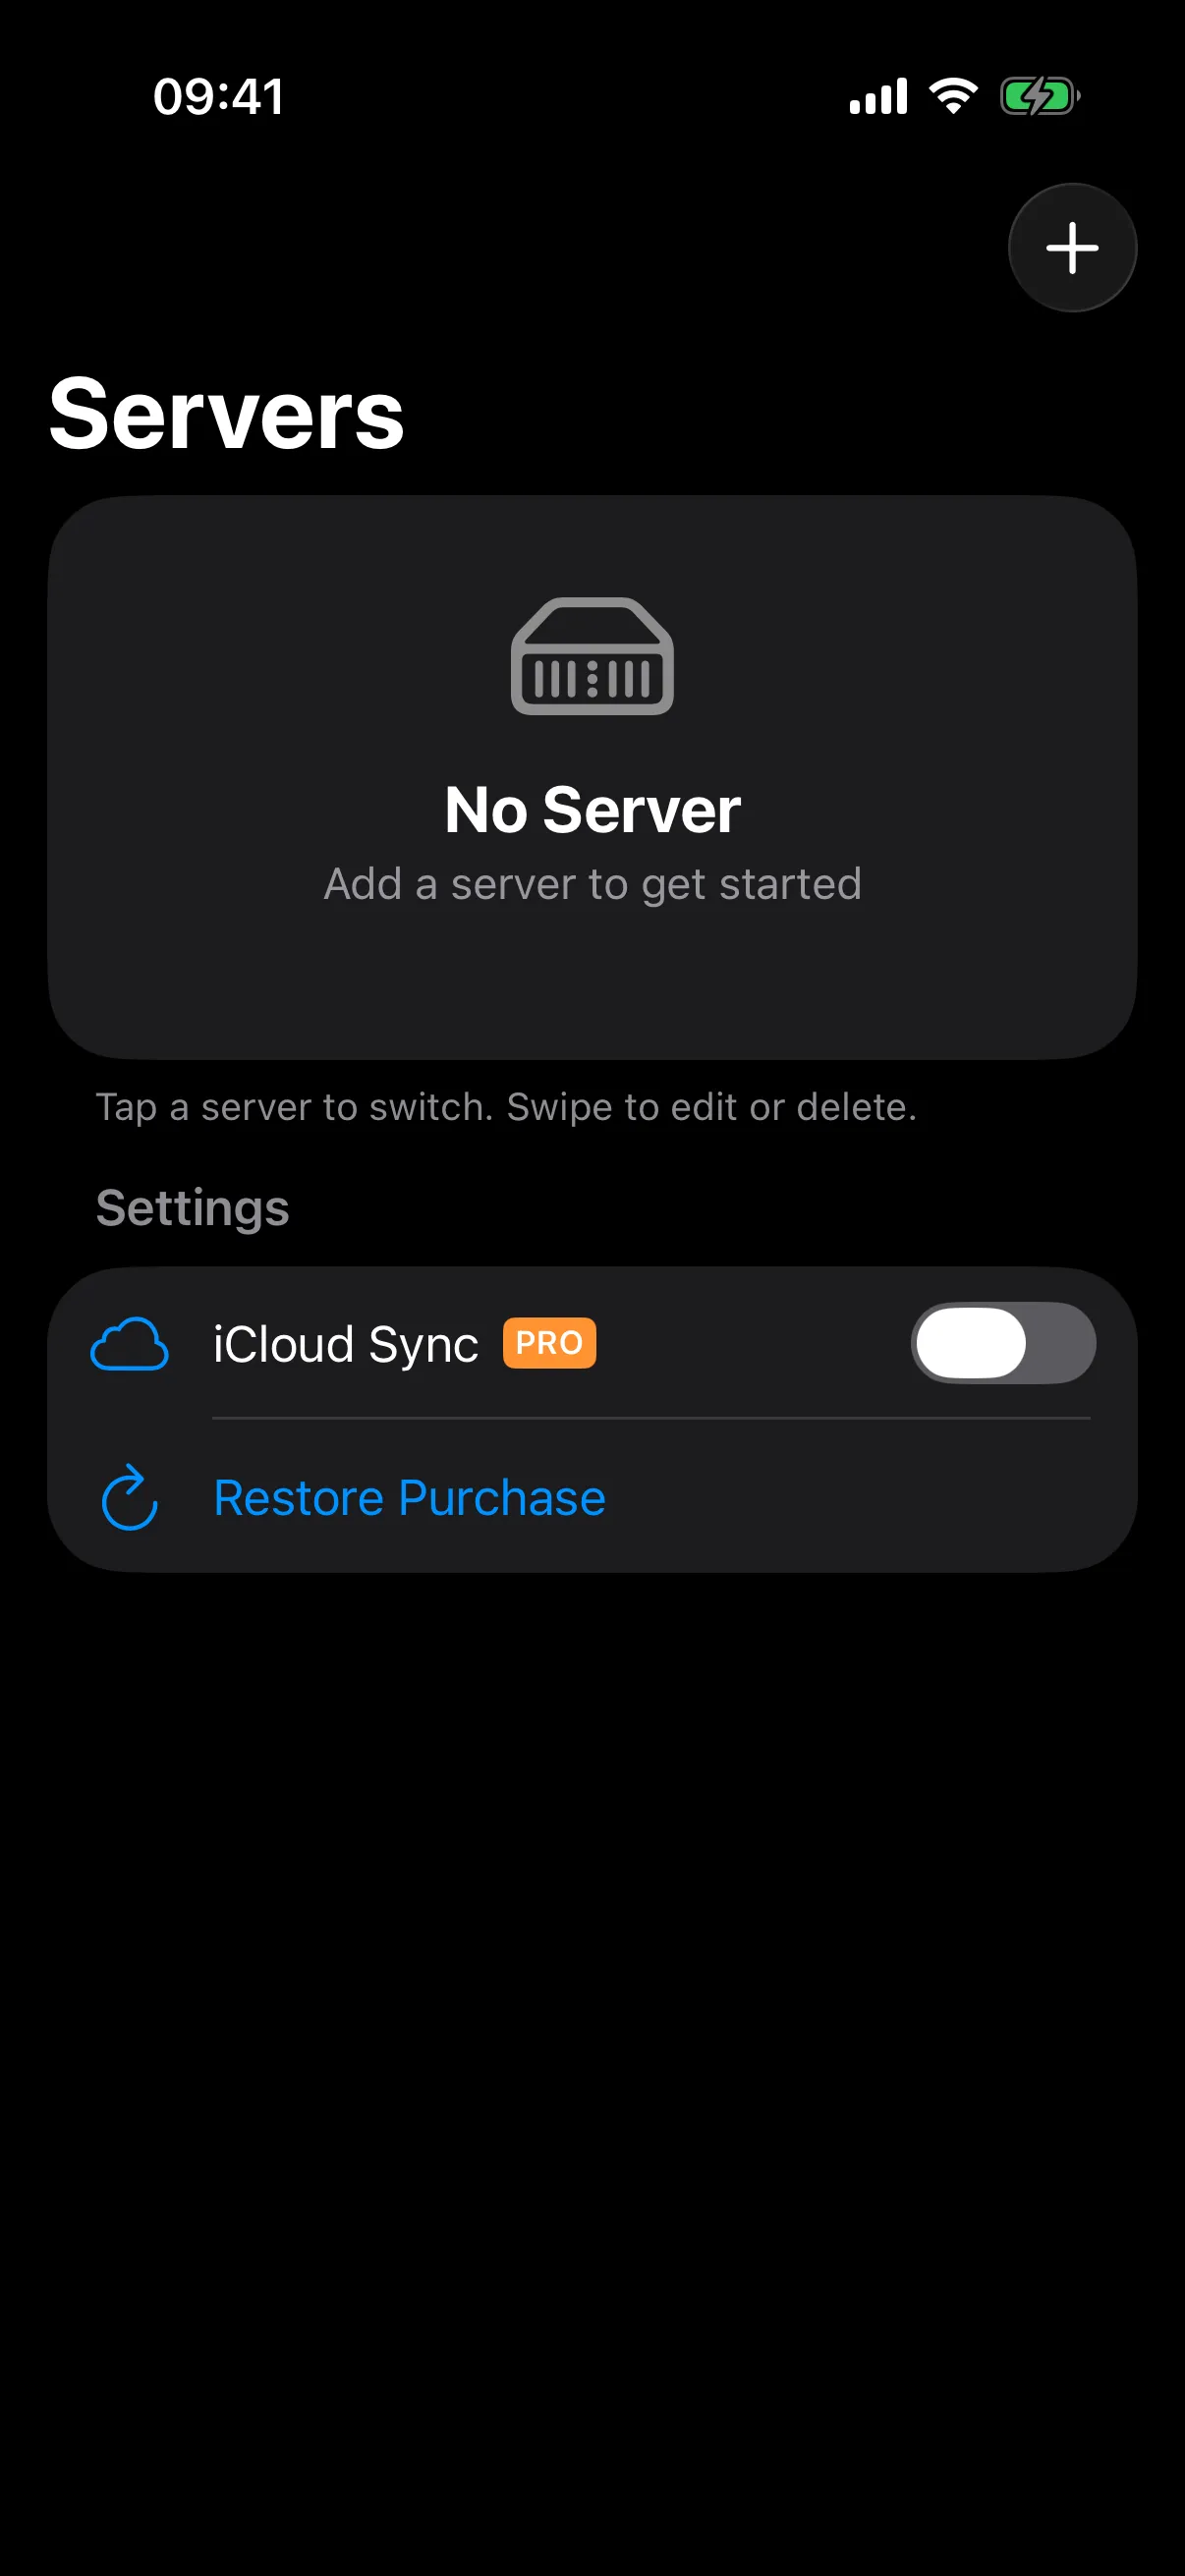
3. Add Your Server in Unraid Deck
Now, open the Unraid Deck app on your iPhone. Click Add Server on the screen or tap the + icon in the top right corner.
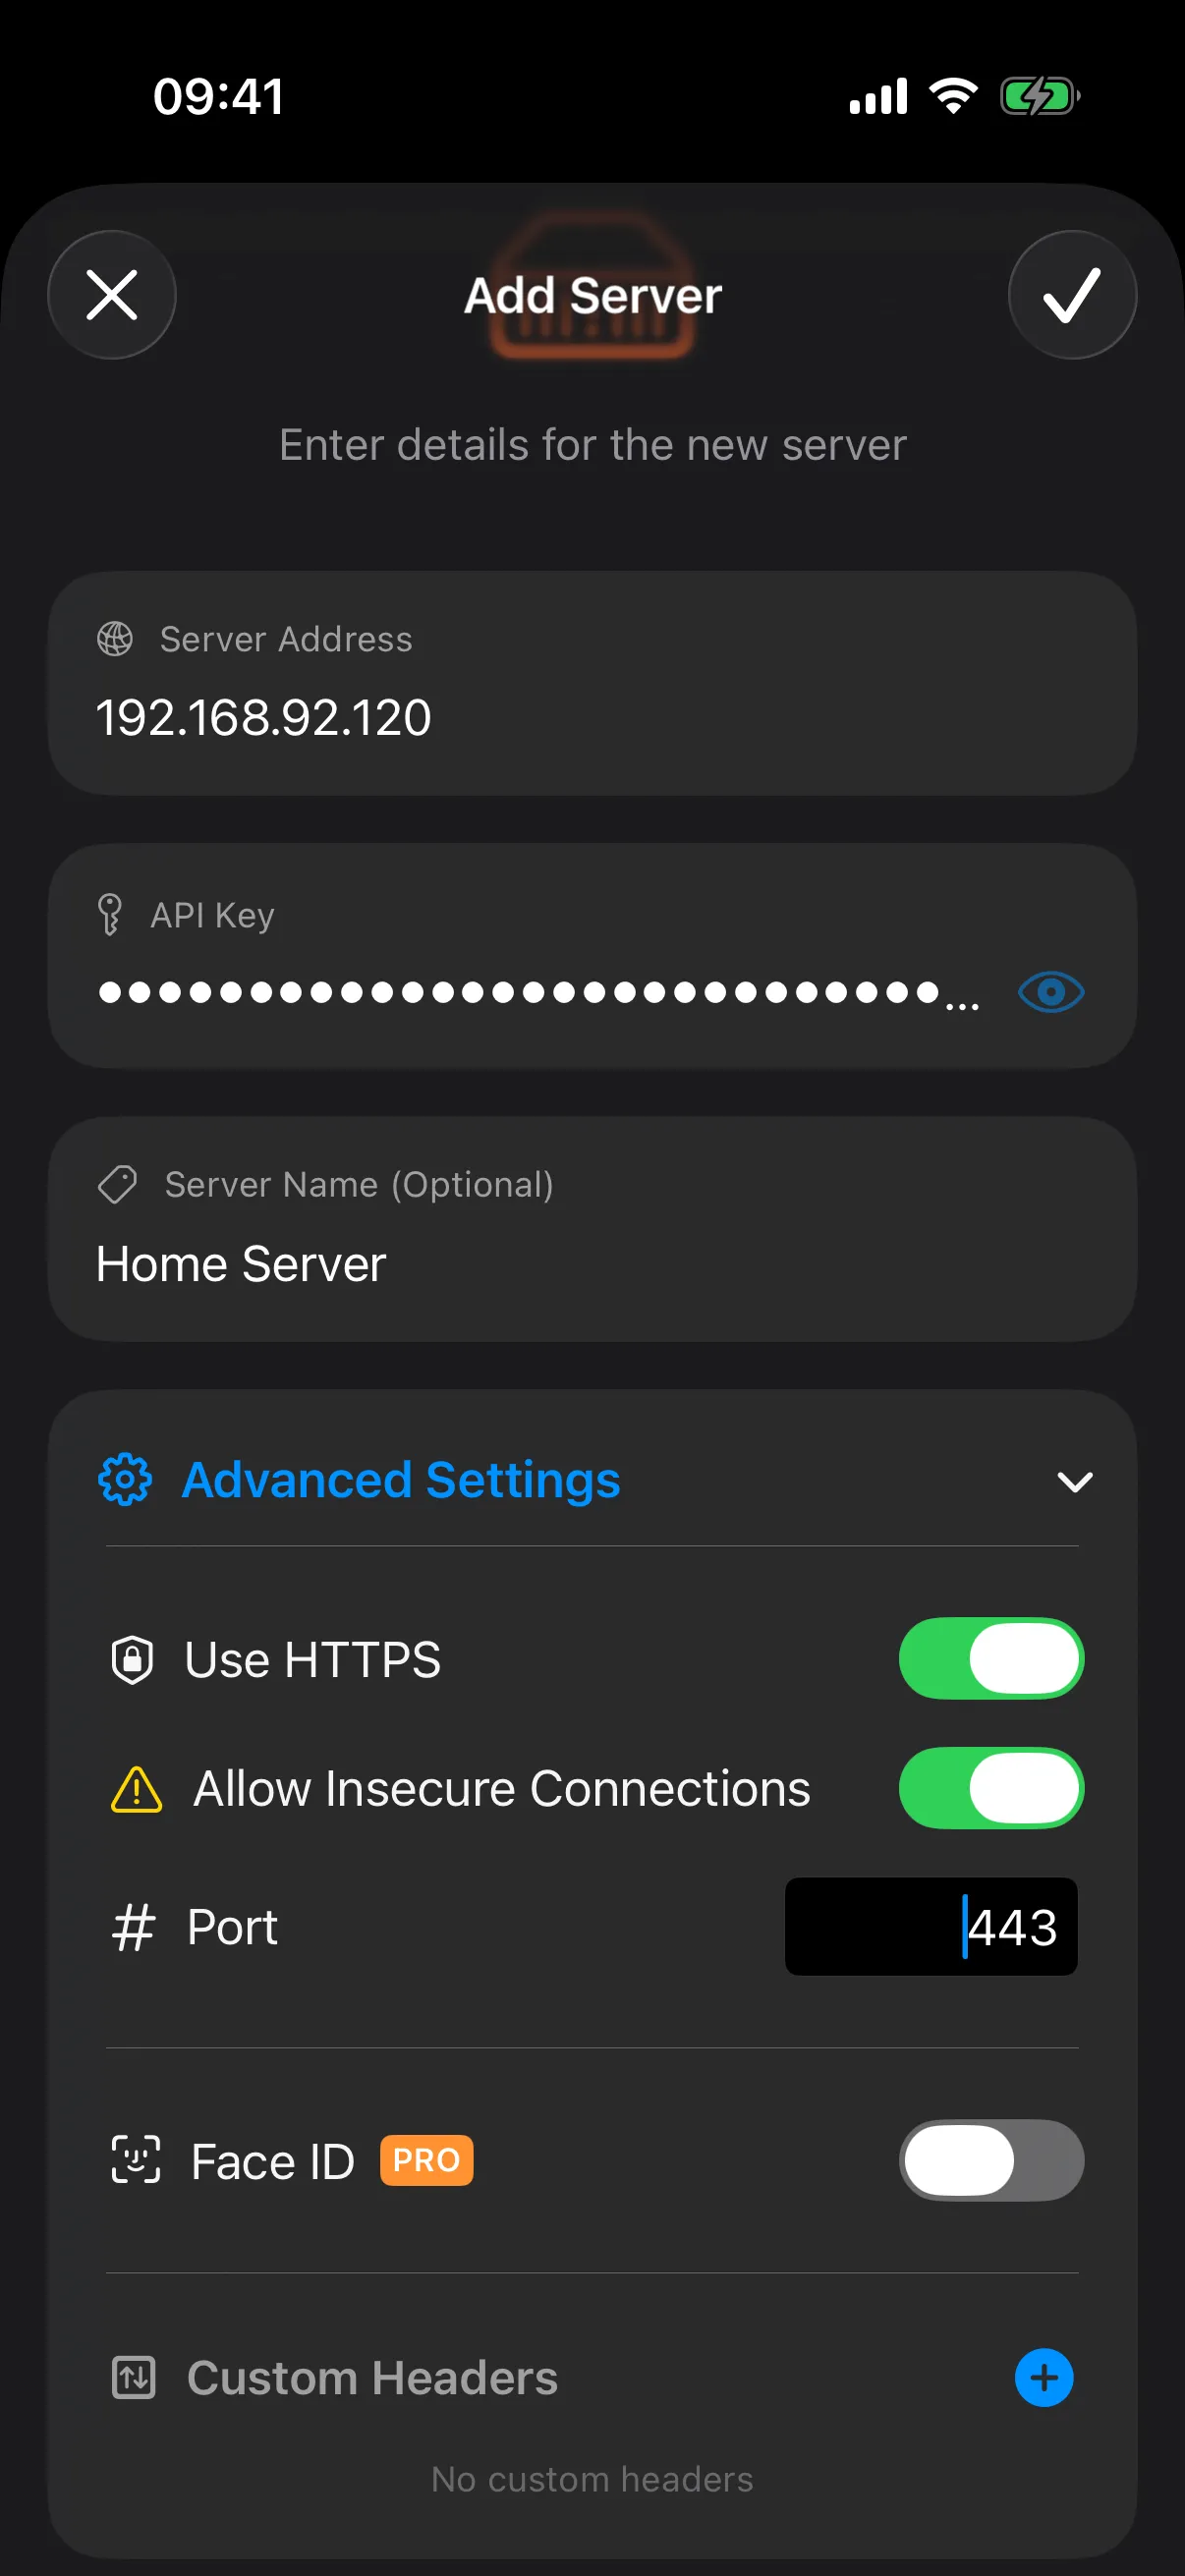
Based on the information you gathered in Steps 1 and 2, fill in the following details:
- Server Address: Your Unraid server’s IP address or bound domain name.
- API Key: Paste the API key you copied in Step 2.
- Port: The HTTP or HTTPS port you confirmed in Step 1.
- Use SSL: Enable this switch if your server is configured to use SSL.
- Allow Insecure Connection: ⚠️ CRITICAL NOTE! If your SSL certificate is a Self-Signed certificate, or issued by a non-standard CA, you MUST enable Allow Insecure Connection. Otherwise, the app will reject the connection due to handshake failure.
Once you have verified all the information is correct, tap Save/Connect.
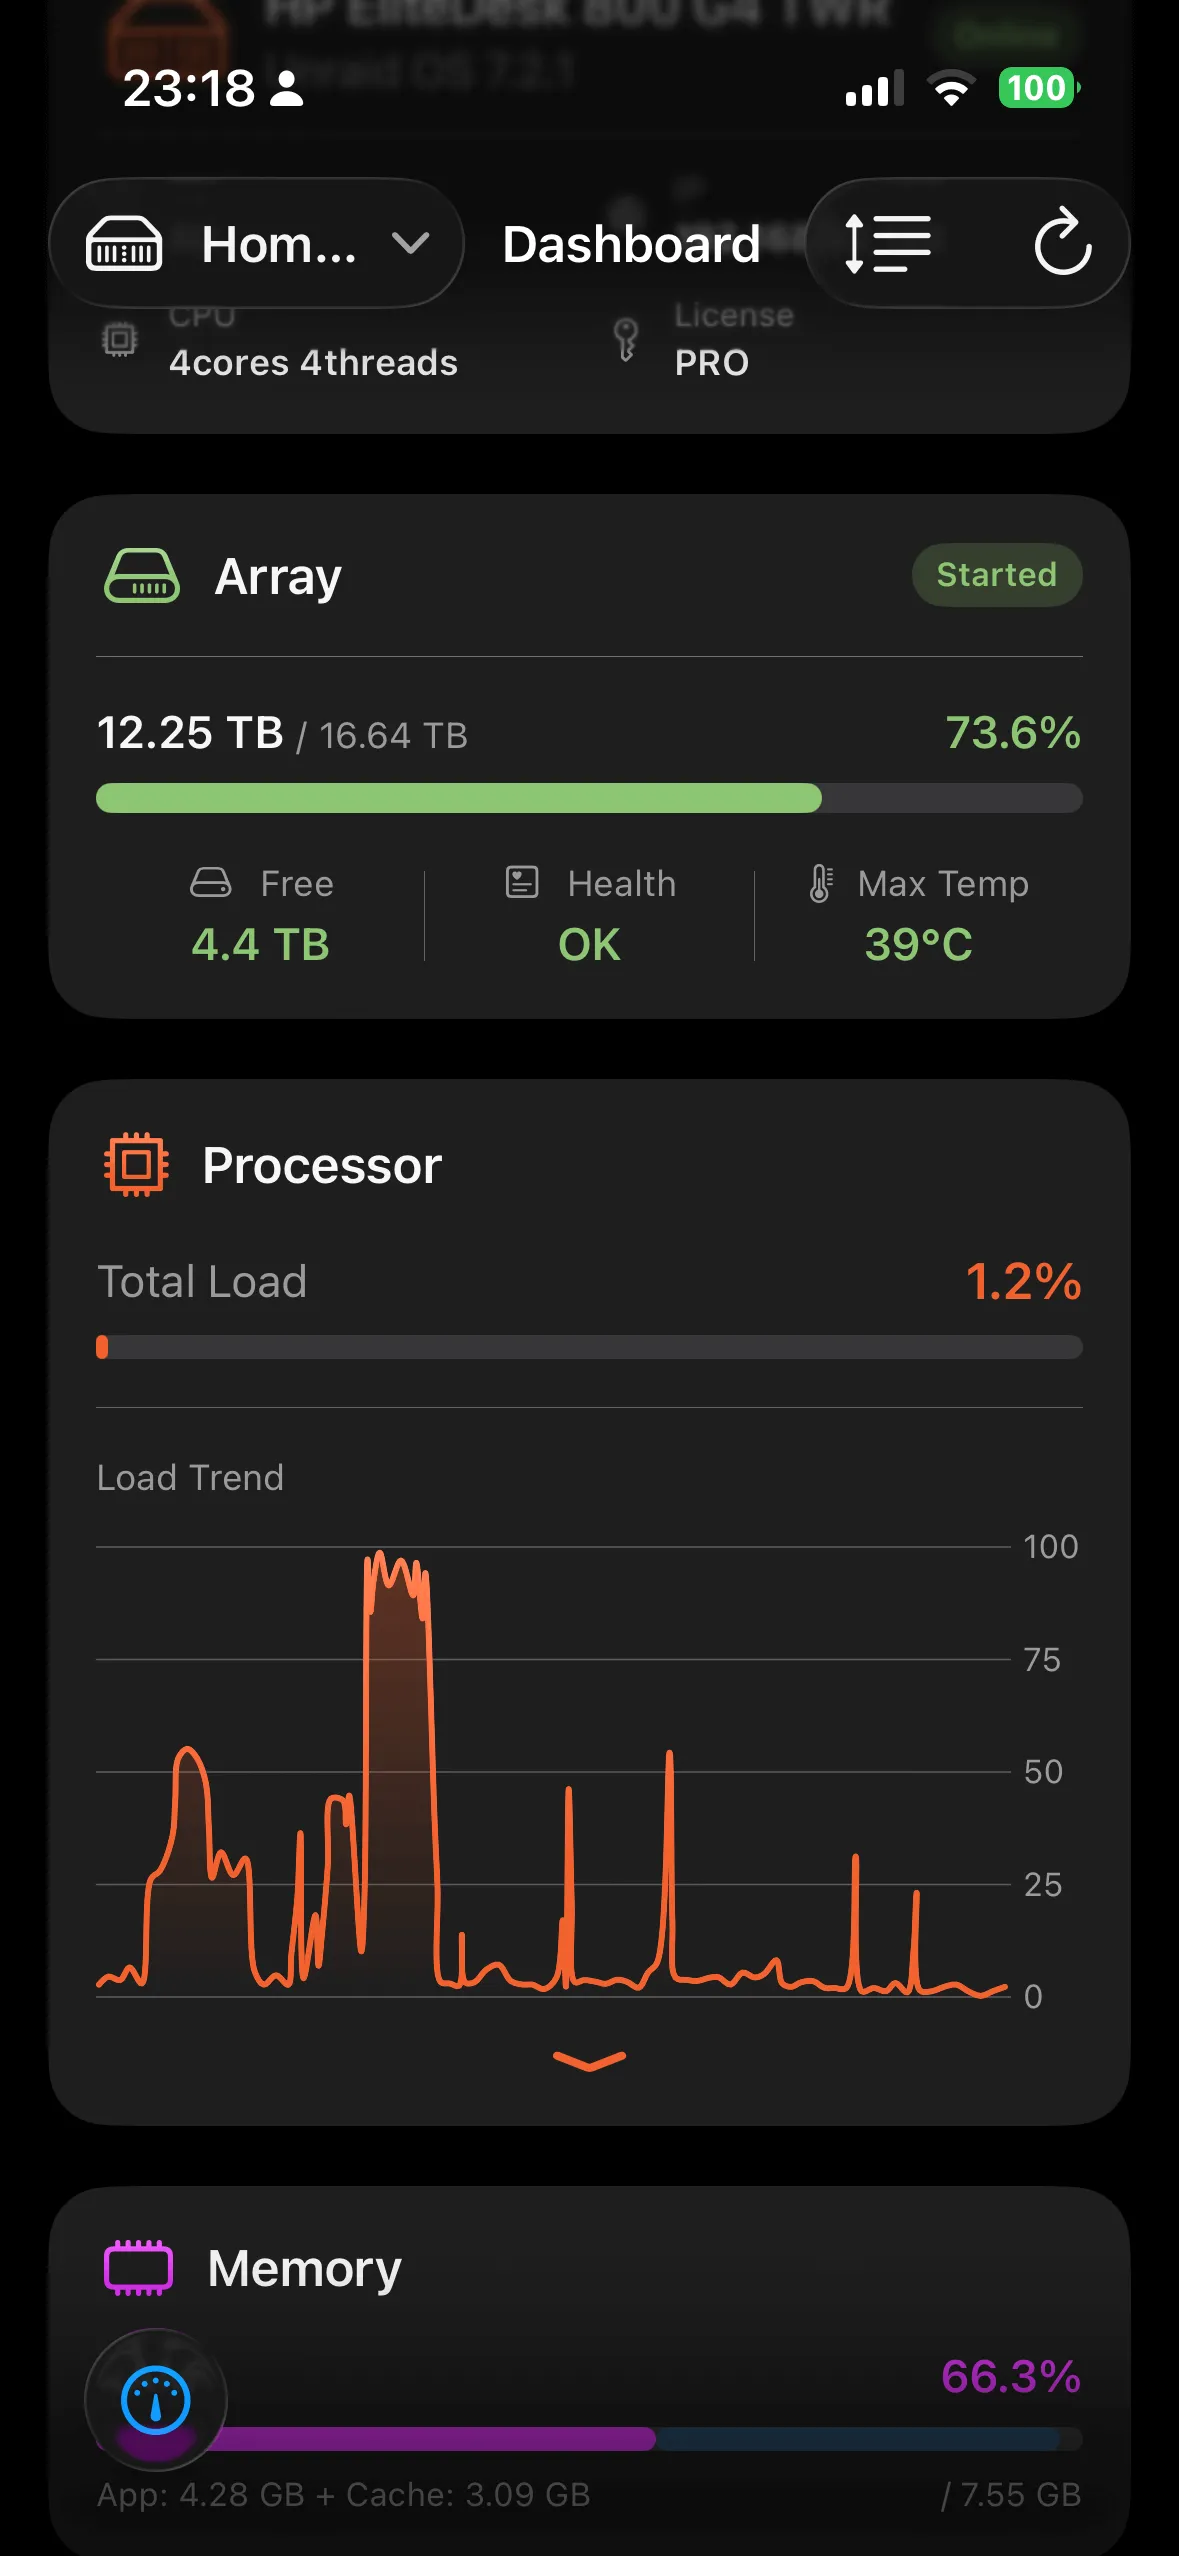
4. Start Managing
Once connected successfully, you will be greeted by the stunning dashboard! You can now freely monitor your system telemetry and manage your Docker containers and Virtual Machines right from your phone.