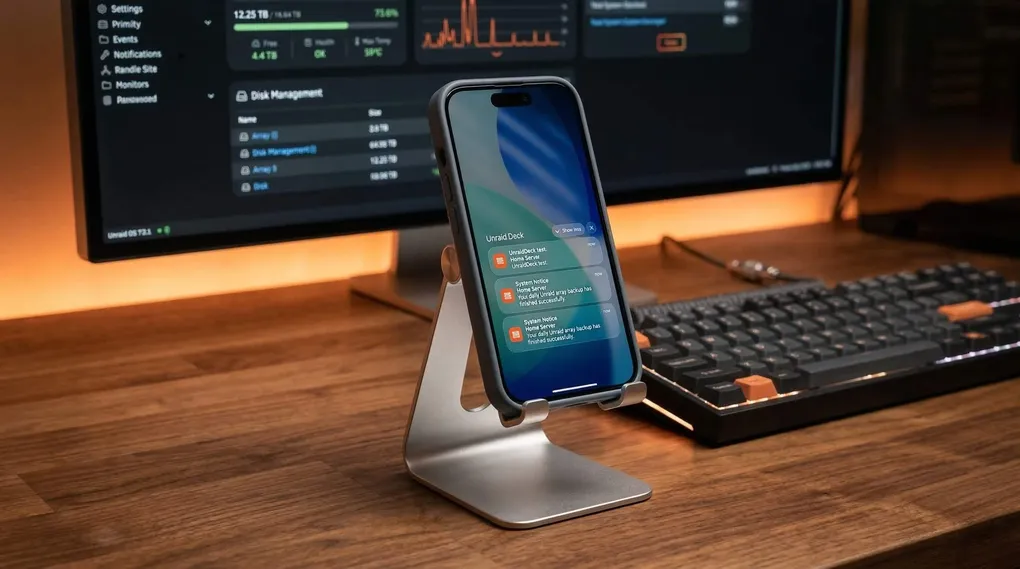
In this guide, I will walk you through how to set up real-time push notifications for your Unraid server using the Unraid Deck iOS app.
The process is straightforward: we will install a lightweight companion plugin on your Unraid server, generate a secure token on your iPhone, and link them together. Let’s get started.
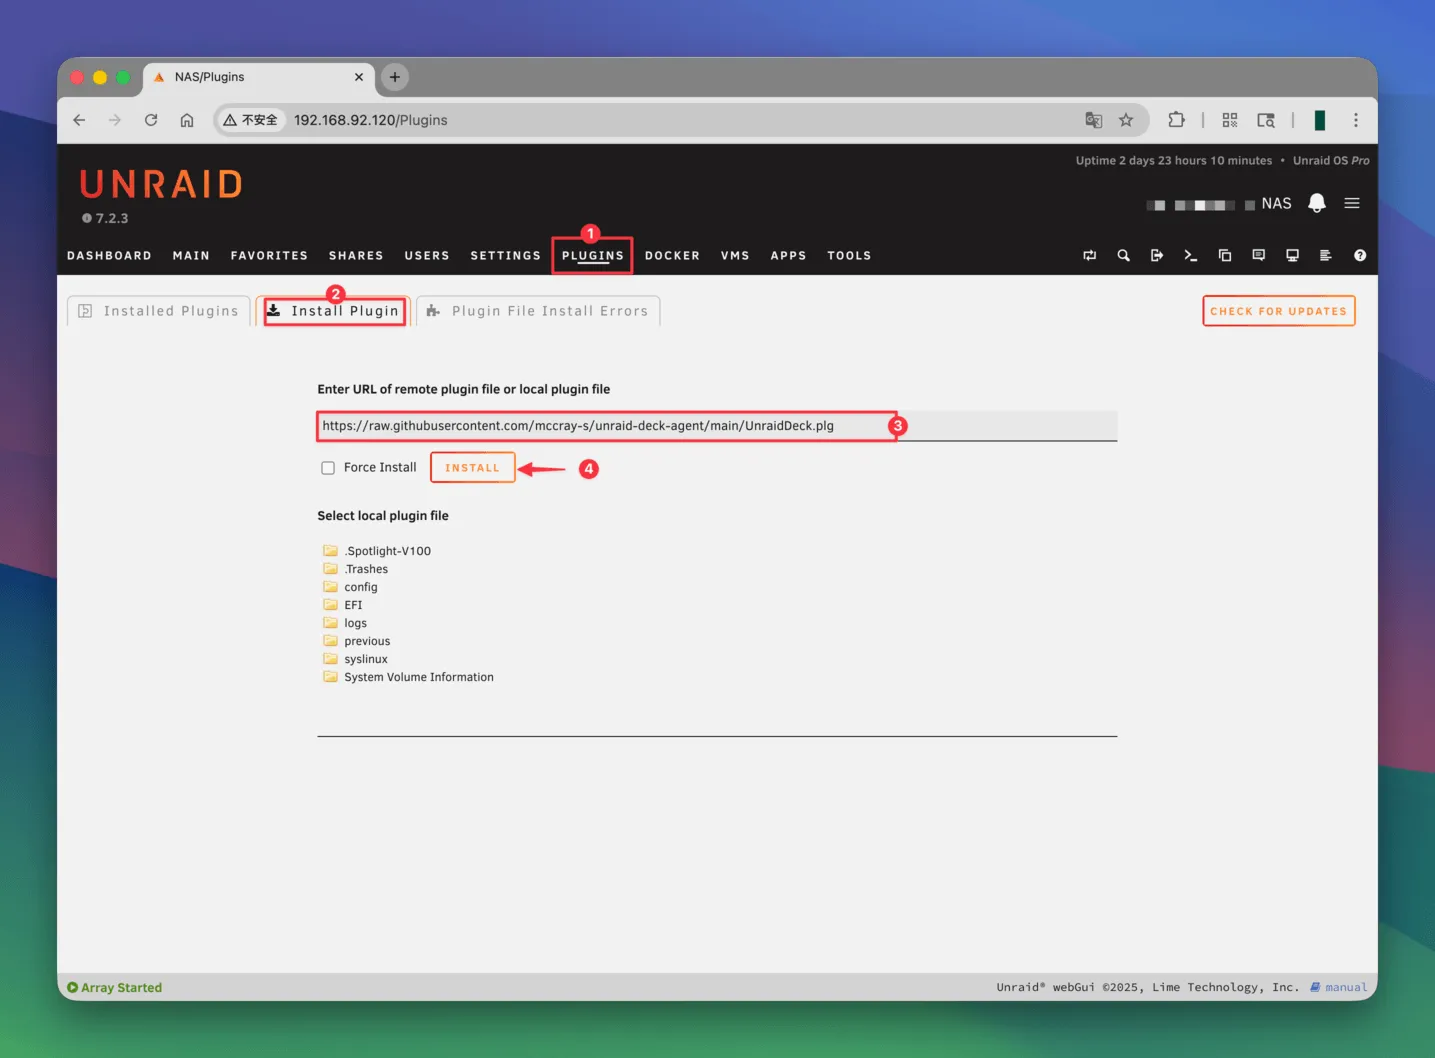
Step 1: Install the Unraid Deck Agent Plugin
First, we need to install the notification agent on your Unraid server so it knows how to send alerts to the app.
- Open your Unraid WebUI in a browser.
- Navigate to the Plugins tab at the top menu.
- Click on the Install Plugin sub-tab.
- Copy the following plugin URL and paste it into the input box:
https://raw.githubusercontent.com/mccray-s/unraid-deck-agent/main/UnraidDeck.plg- Click the Install button and wait for the installation process to complete.

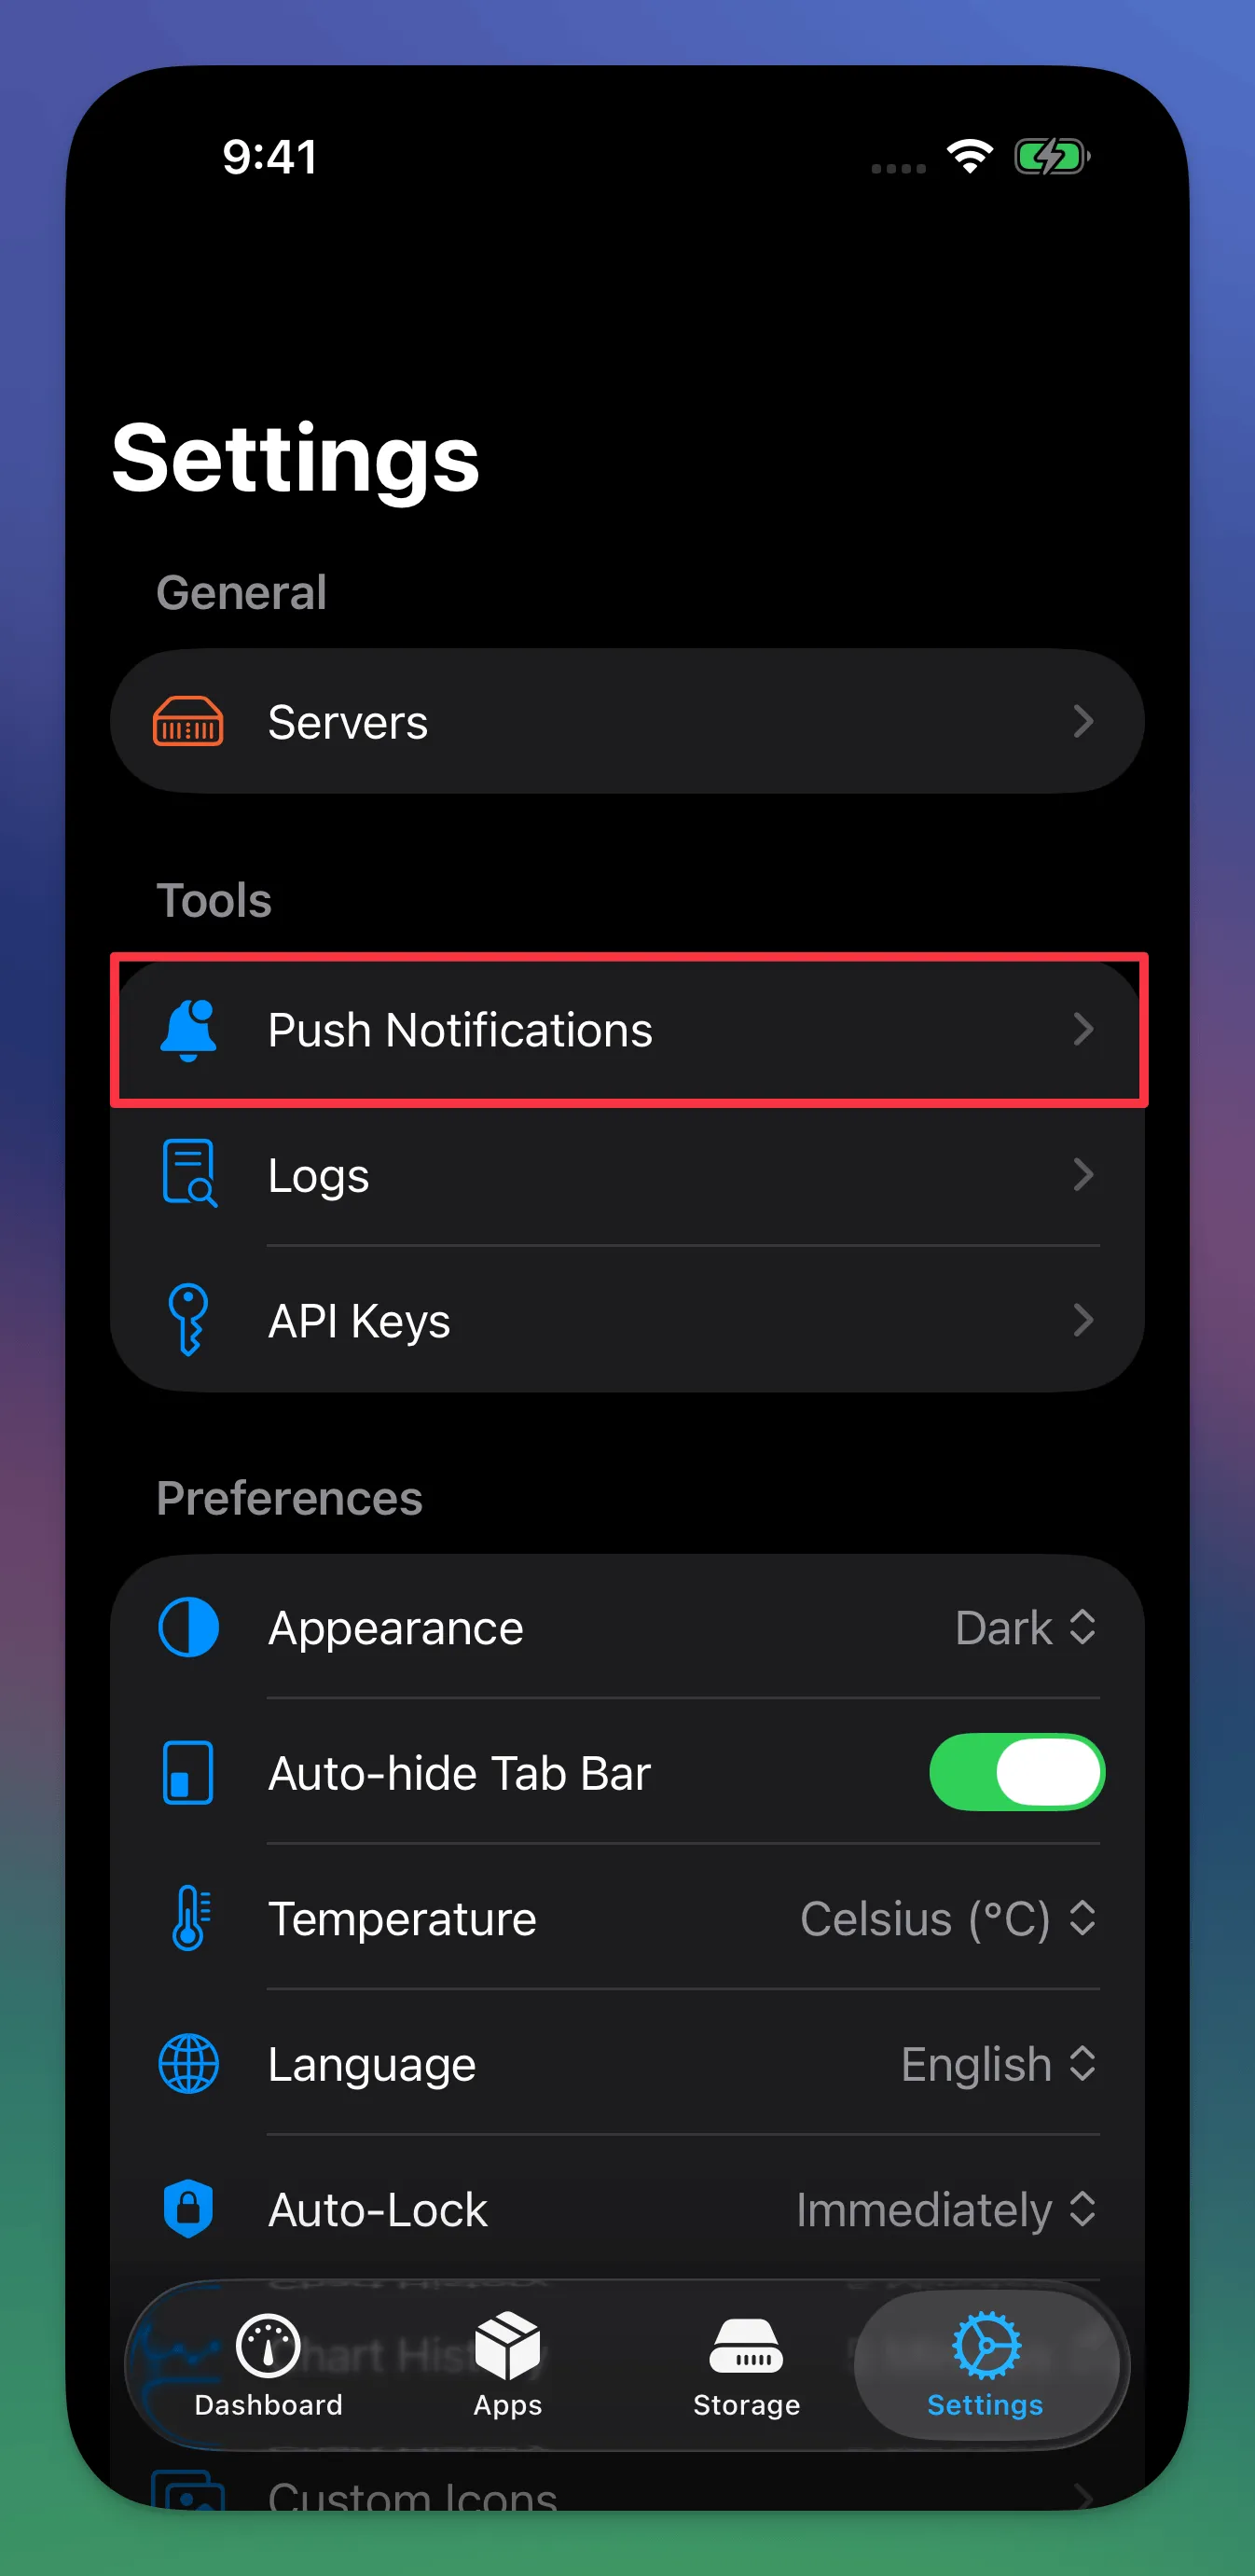
Step 2: Get Your App Token
Next, we need to generate a unique token from the Unraid Deck app. This token securely links your specific iPhone to your server’s notifications.
- Open the Unraid Deck app on your iPhone.
- Go to the Settings tab.
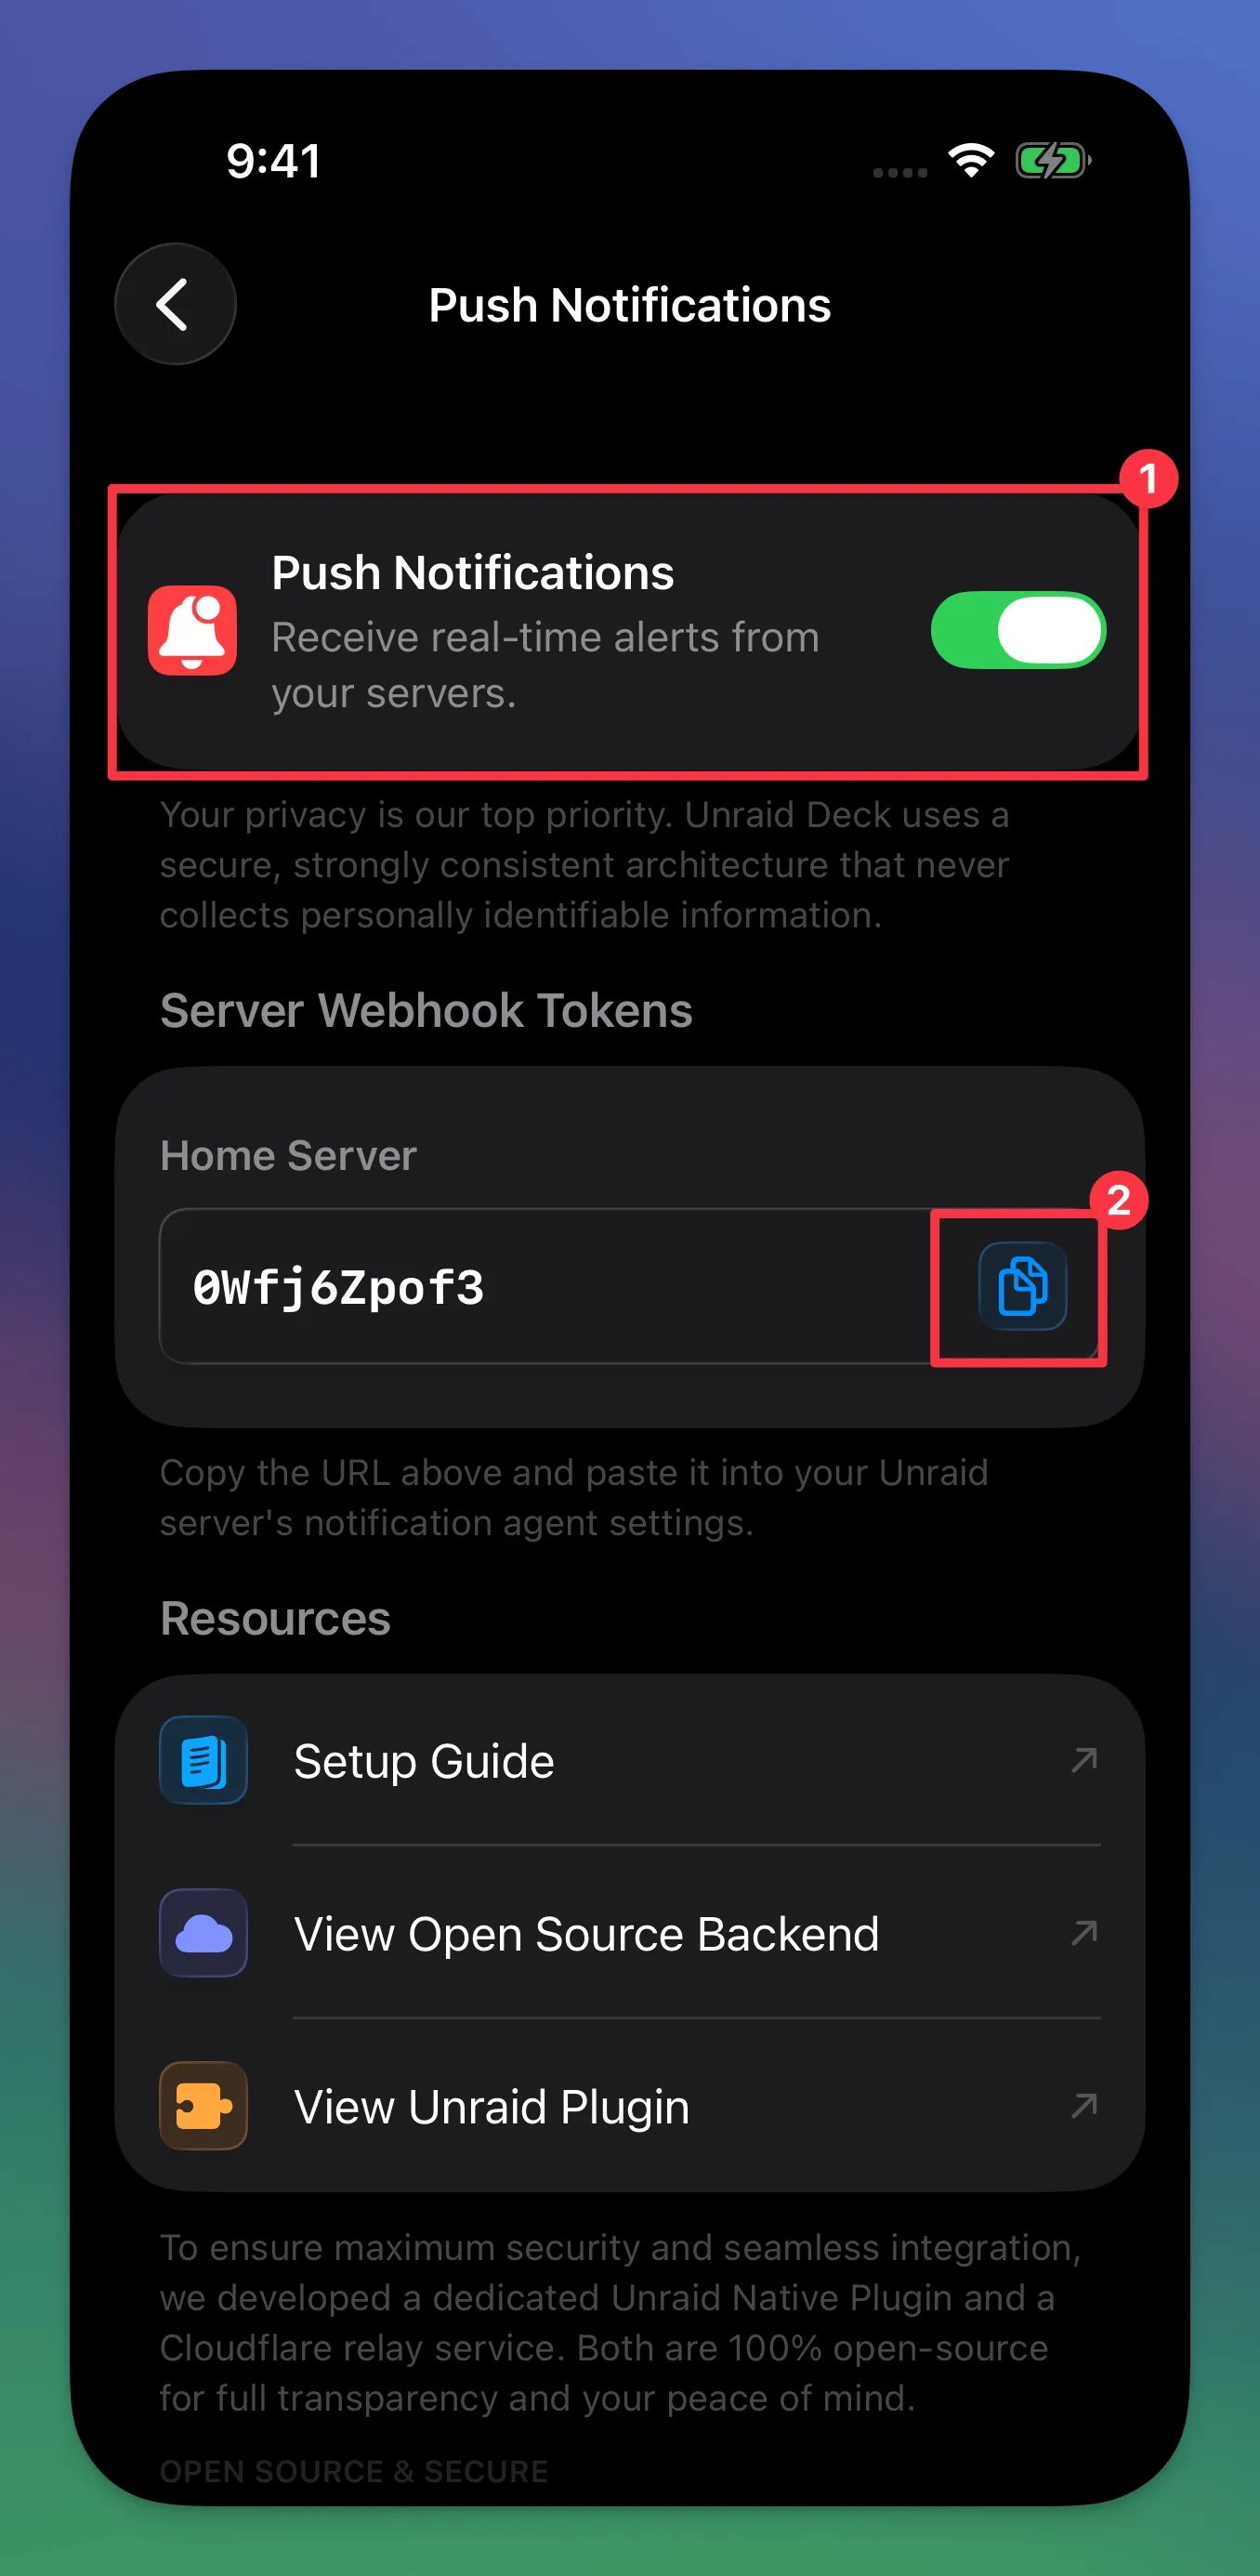
- Tap on Push Notifications and toggle the switch to turn it on.
- The app will generate a unique App Token. Tap to copy this token to your clipboard (you will need it for the final step).
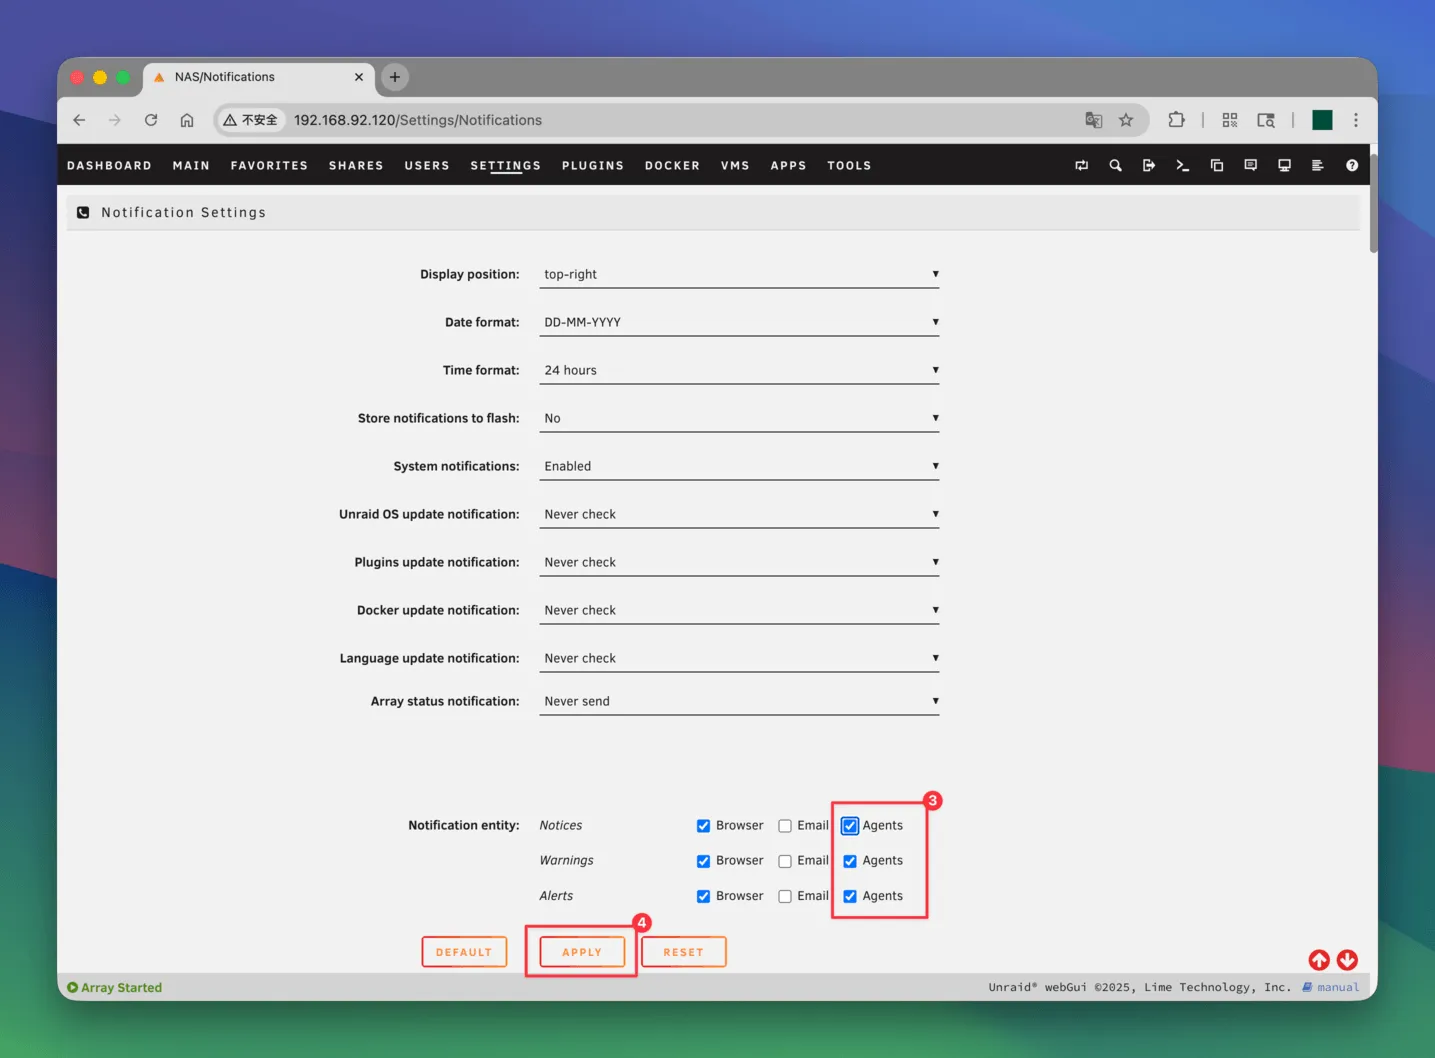
Step 3: Configure Unraid Notification Settings
Now that the plugin is installed and you have your token, the last step is to configure Unraid to use this agent for sending alerts.
- Go back to your Unraid WebUI.
- Navigate to the SETTINGS tab at the top menu.
- Click on Notification Settings.
- At the very top of the page, look for the Notification entity setting and ensure the Agents checkbox is ticked.
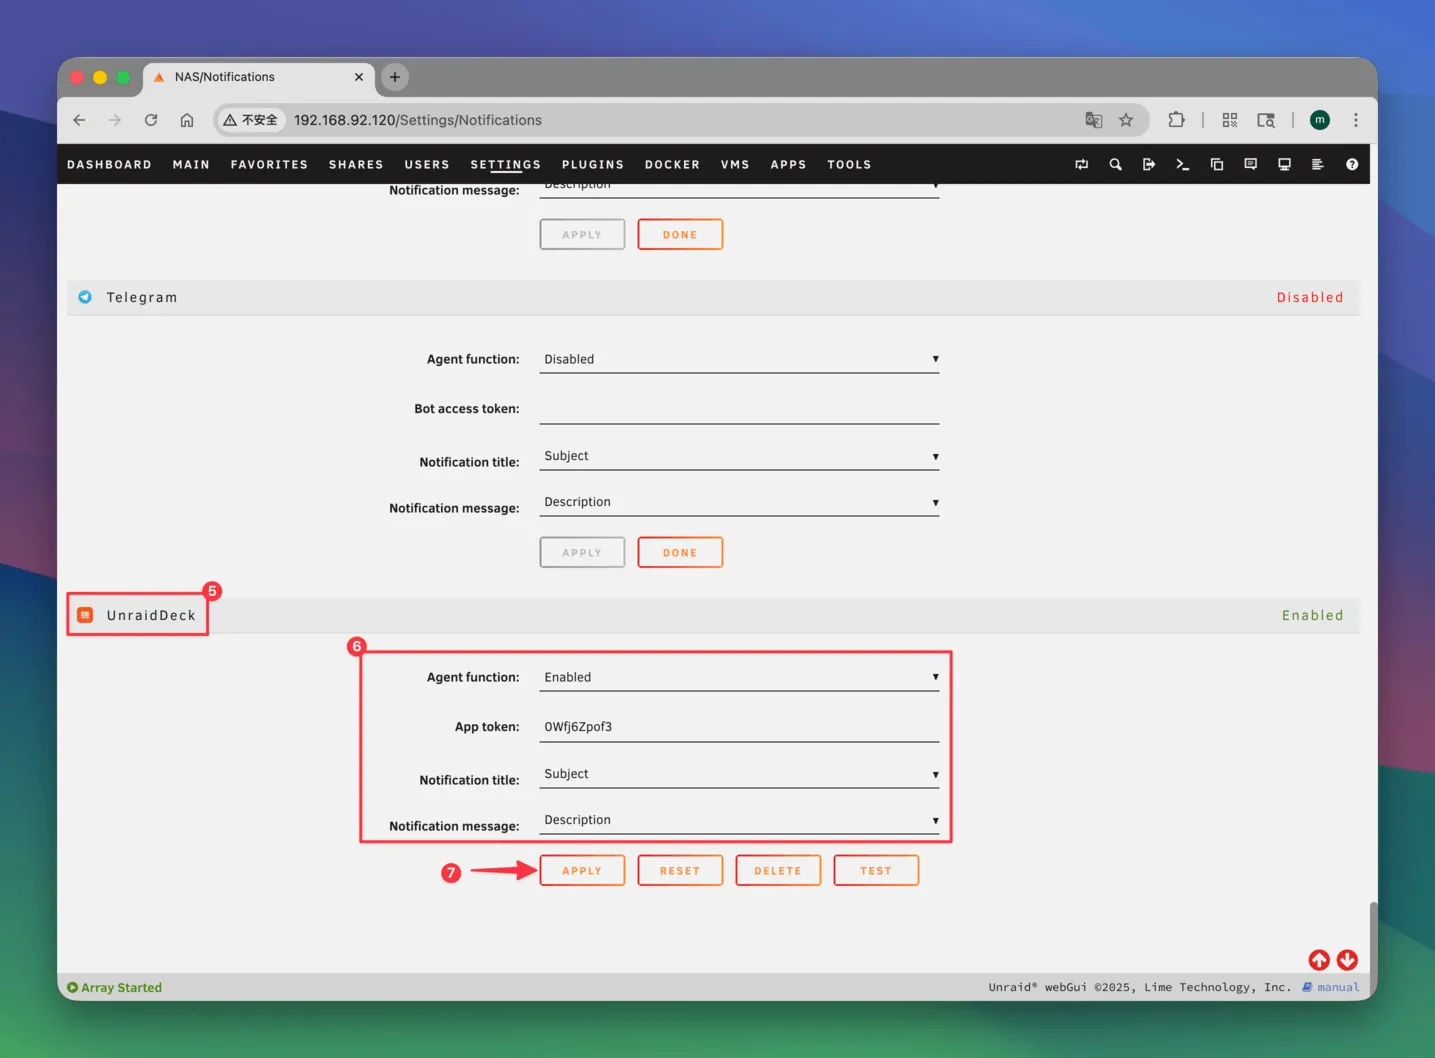
- Scroll down the page until you find the new UnraidDeck agent section.
- Toggle the switch to Enable it.
- Paste the App Token you copied from the iOS app into the designated text field.
- Click the Apply button to save your changes.

Test Your Setup
To make sure everything is working correctly, simply click the TEST button located next to the UnraidDeck agent settings.
Within a few seconds, you should receive a test push notification directly on your iPhone.
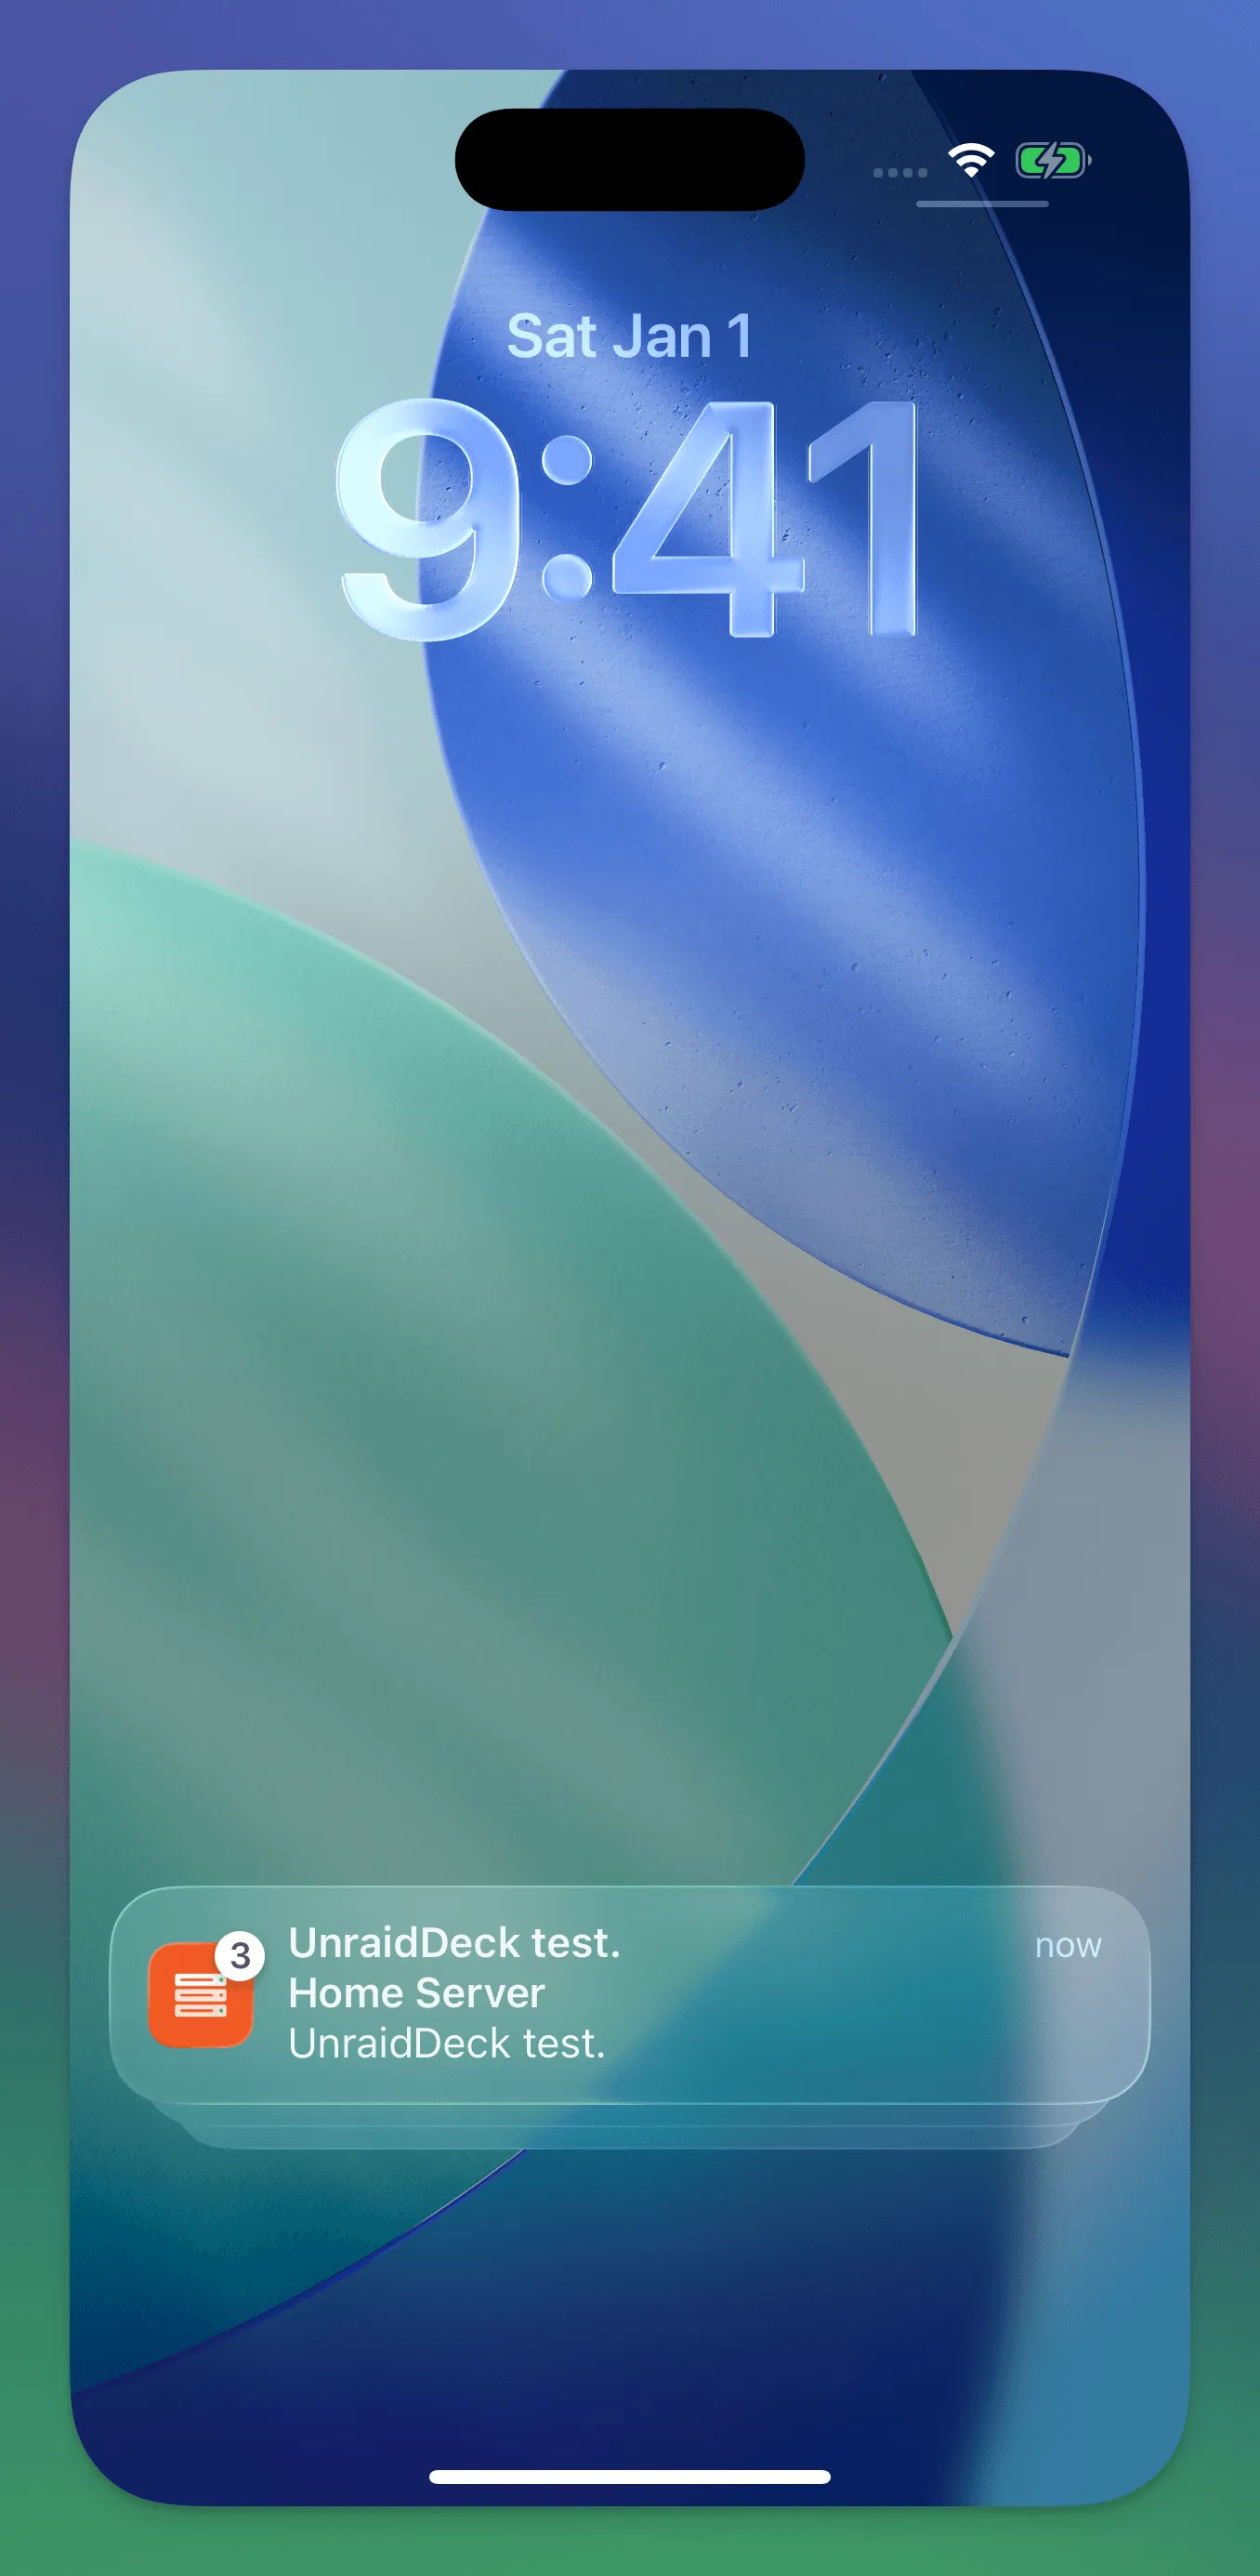
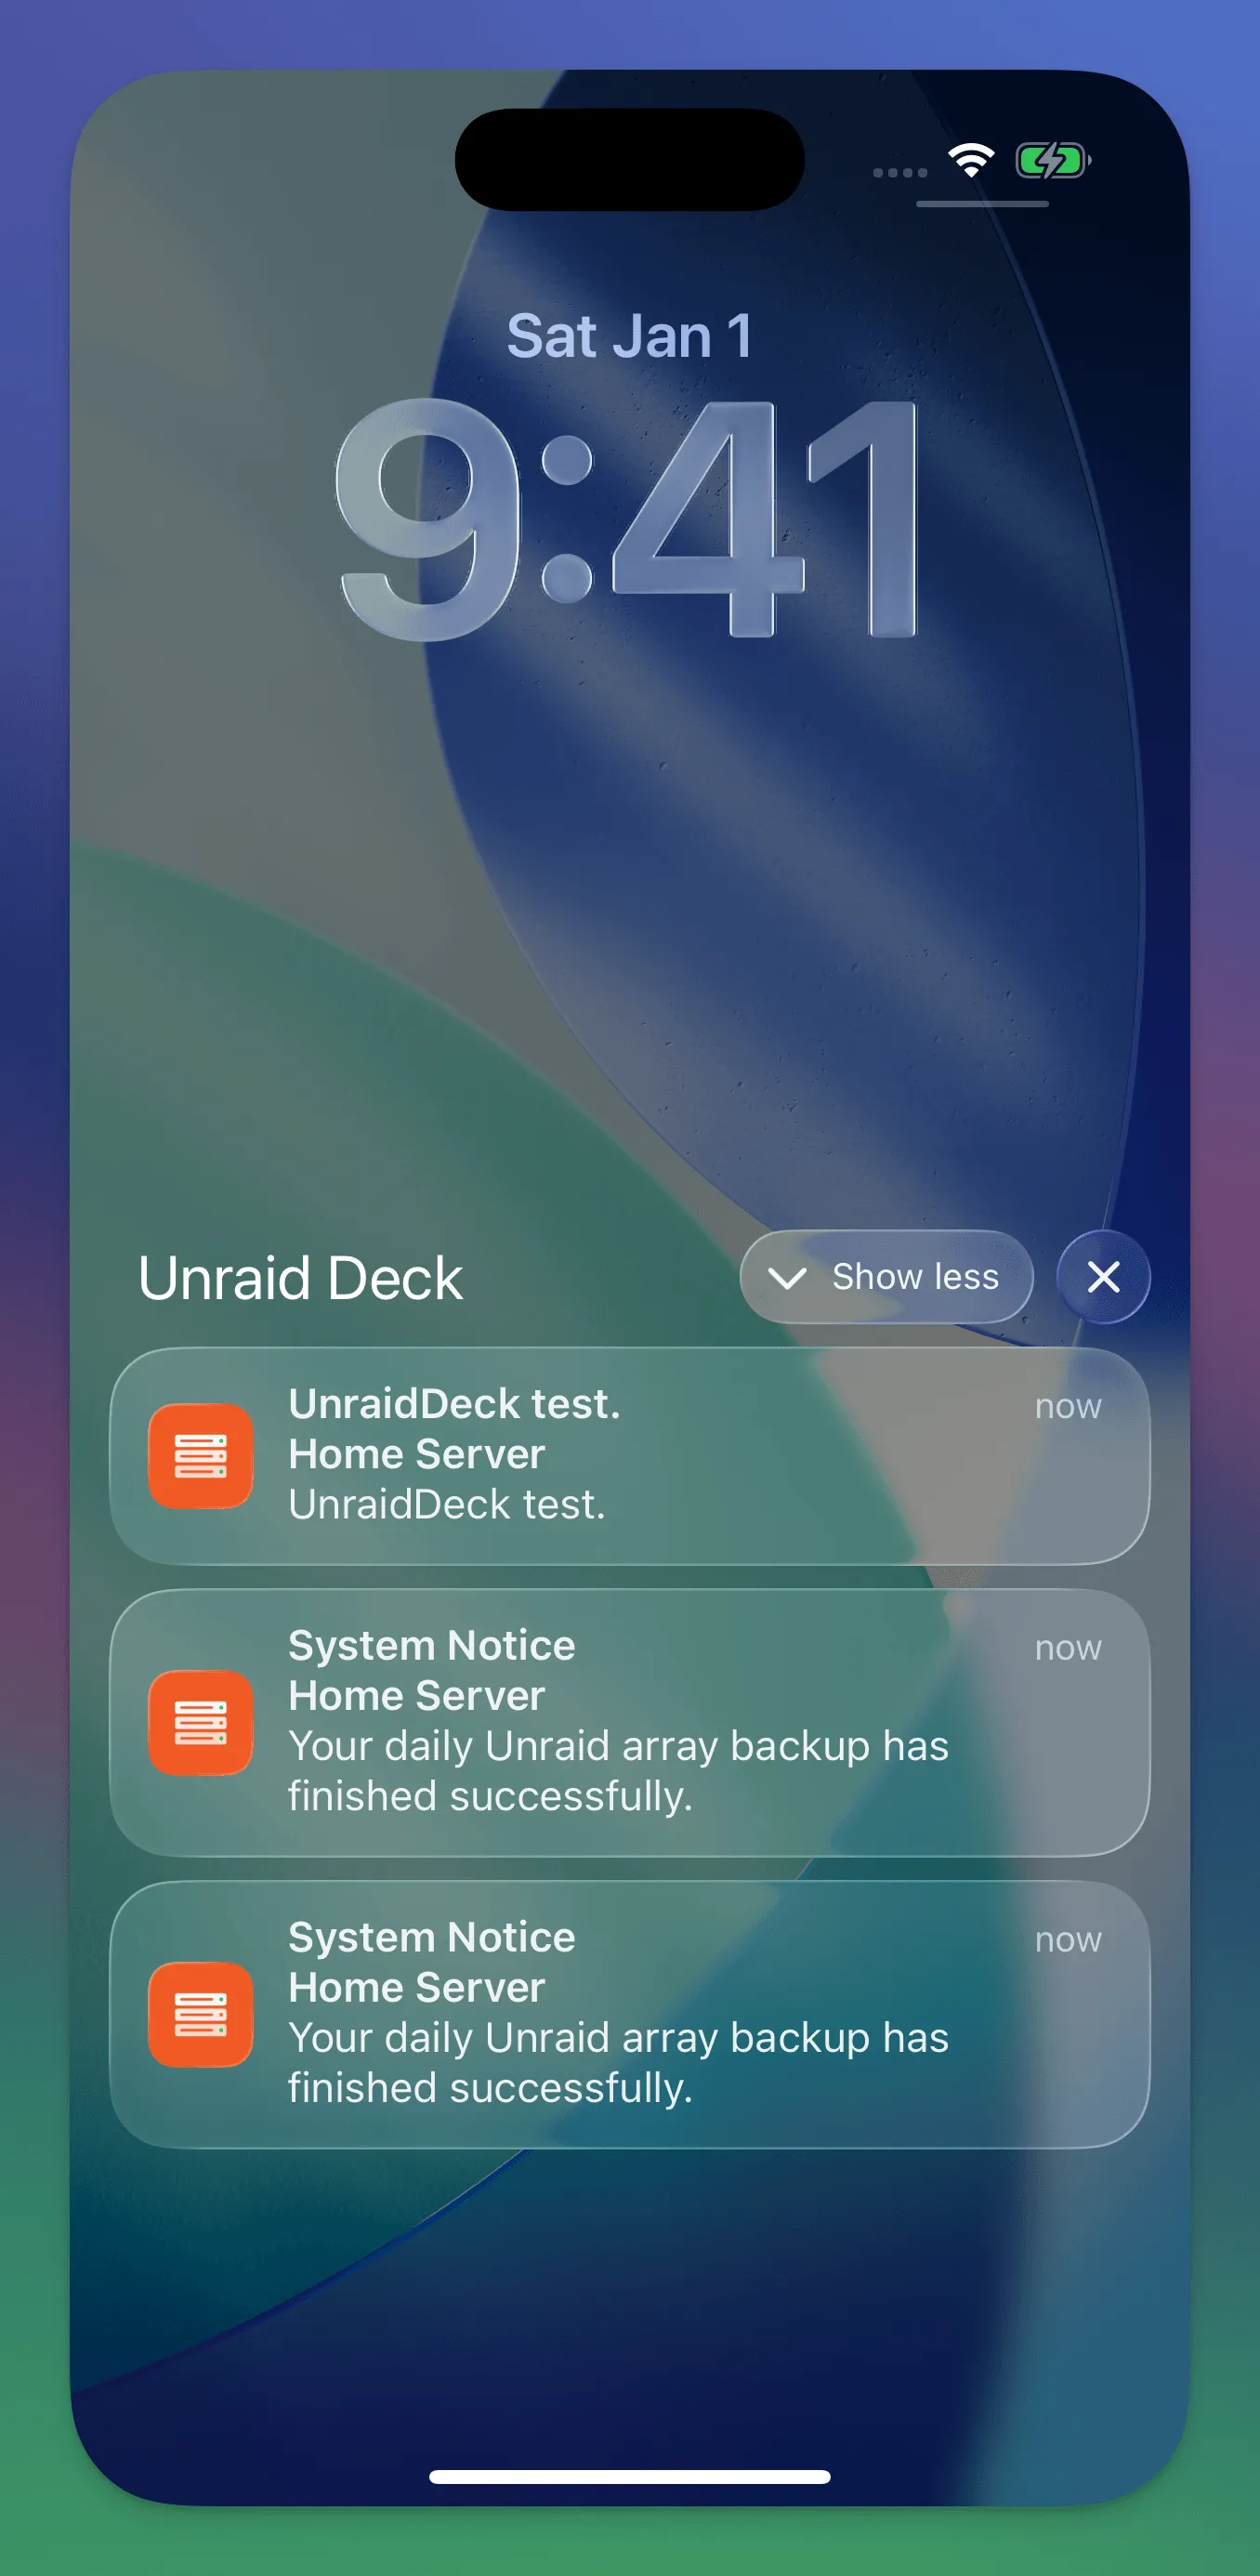
If you see the alert, your setup is complete! Your device will now receive real-time warnings and notices based on your Unraid notification preferences.
Open Source & Transparency
At Unraid Deck, we believe in privacy and security. The entire notification delivery pipeline is 100% open source, allowing you to audit or even self-host the relay service:
- Cloudflare Worker Relay Service: unraid-push-worker
- Unraid Native Plugin: unraid-deck-agent